DIY Kitchen Backsplash: Lessons I learned from making every mistake
-
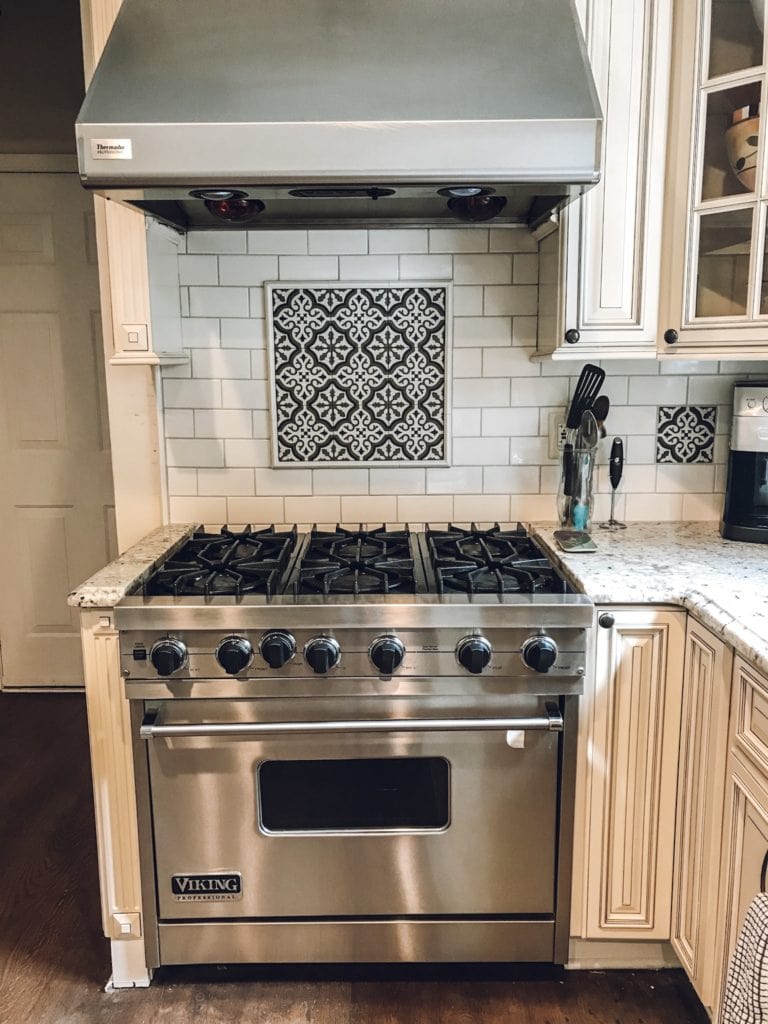
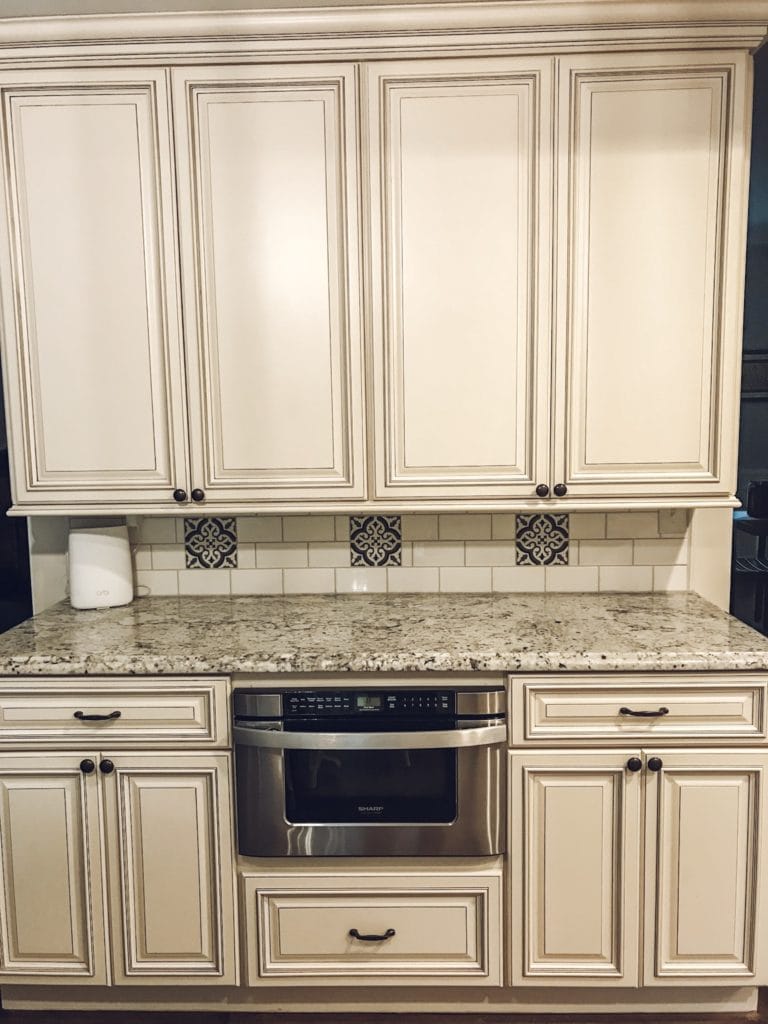
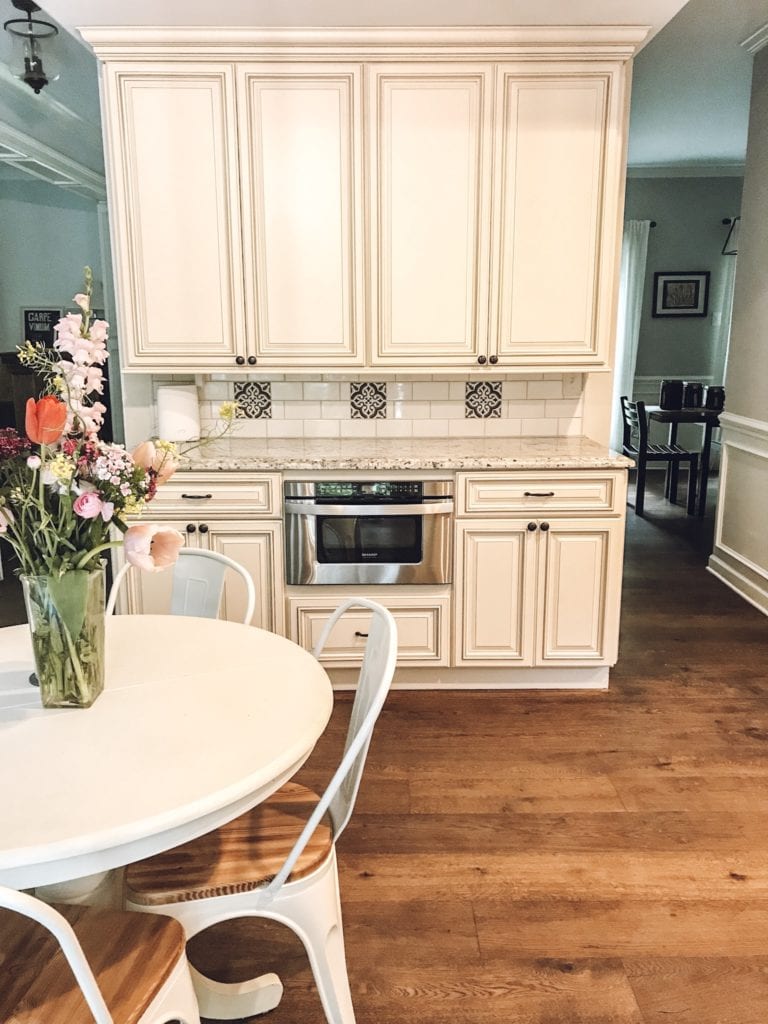
Before -
After
-
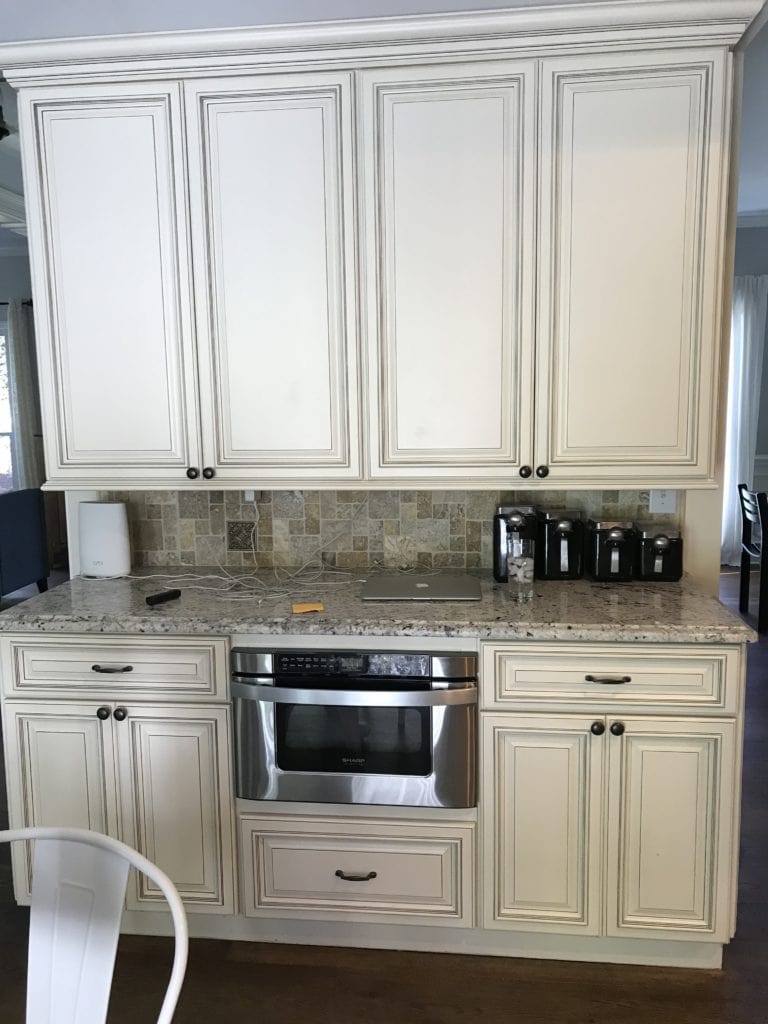
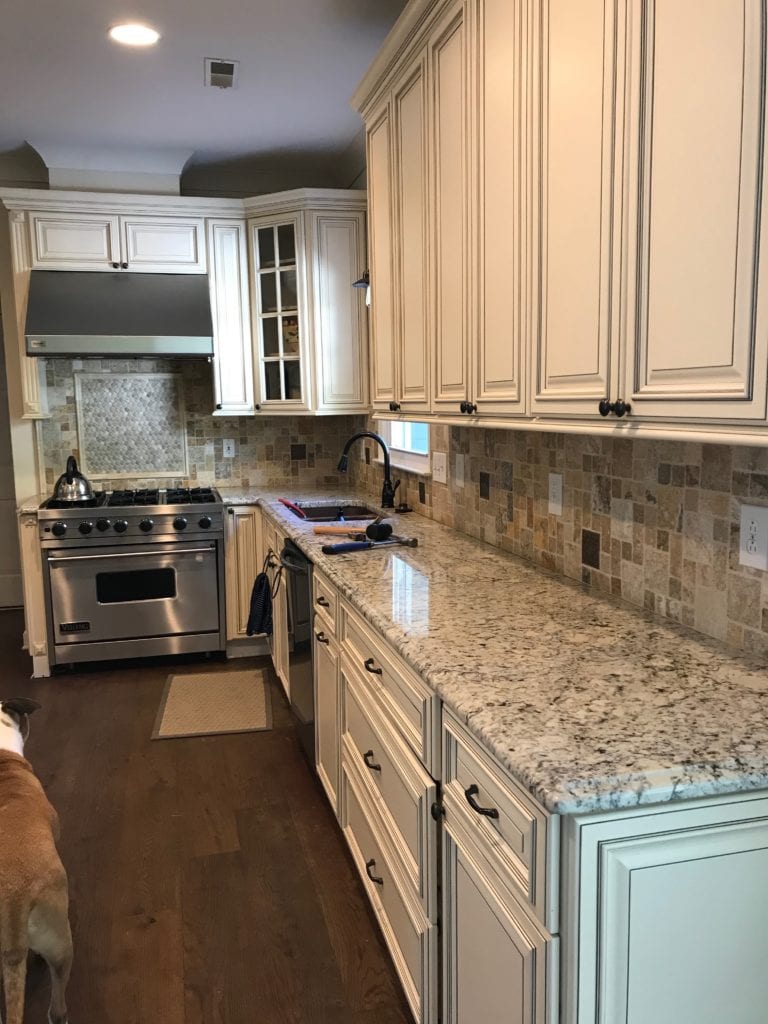
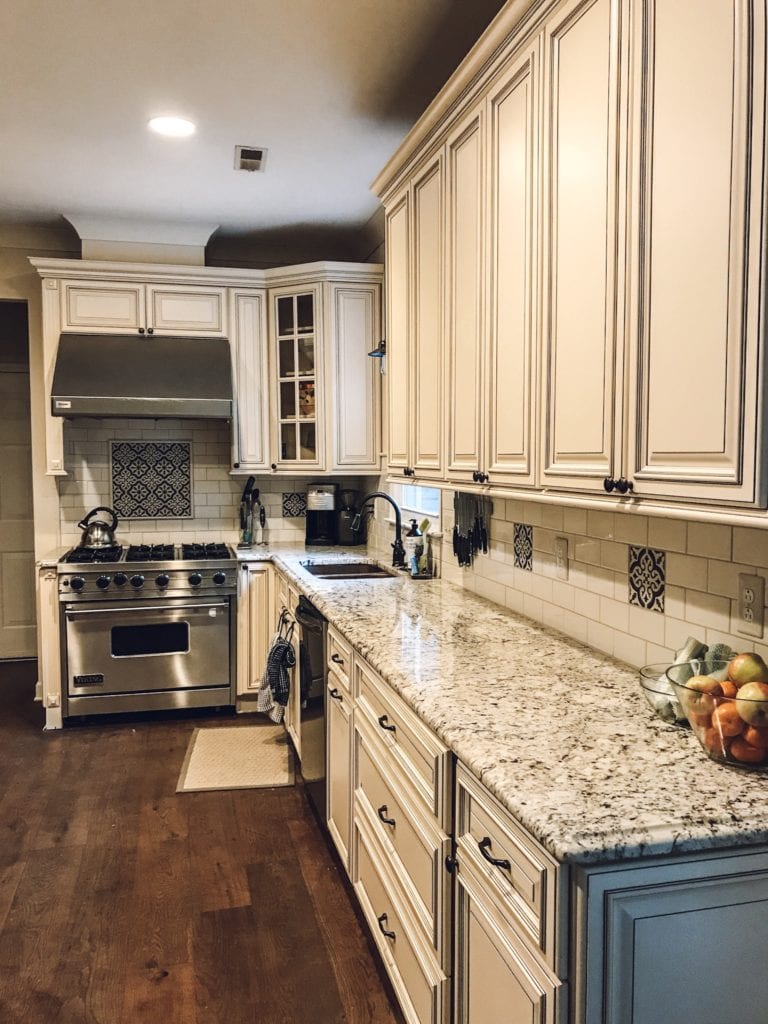
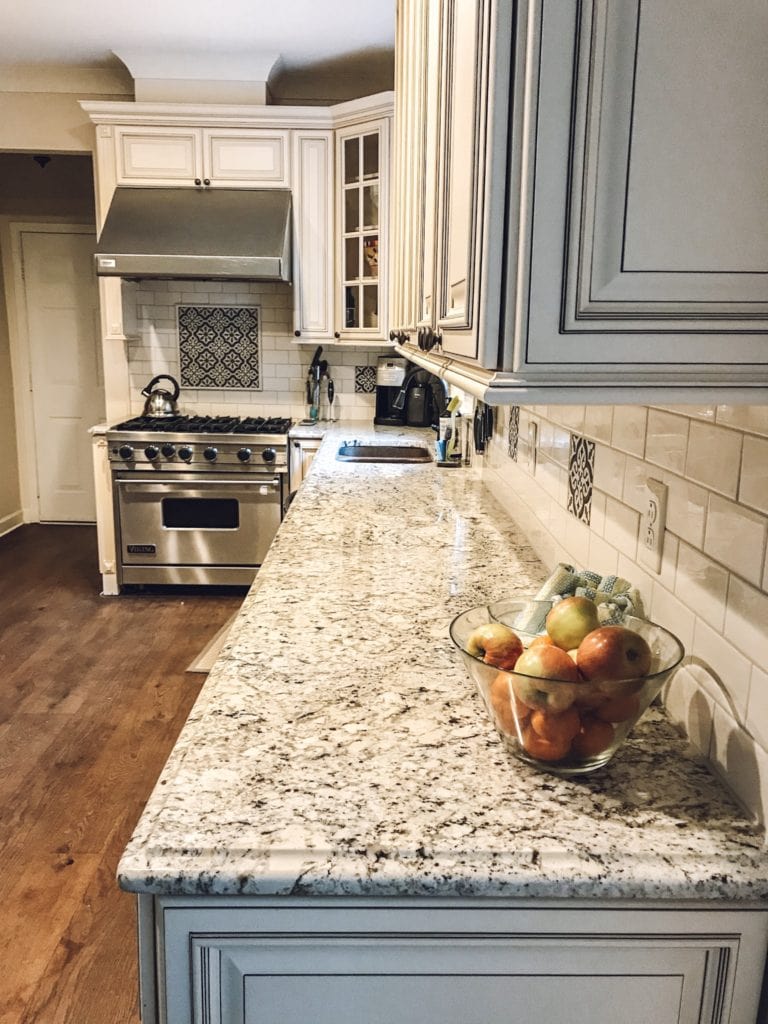
Before -
After
Everything might take approximately 3-4 x's longer than estimated (if you don't use these tips)
My goal in writing this post is to help you avoid ALL of the mistakes I made and road bumps I encountered during this DIY kitchen backsplash project. I literally had some kind of issue every step of the way. It was a learning experience. I naively thought this project was going to take a weekend and it took much longer than that...try 3+ weeks. If I ever do DIY tiling again check my sanity, I think everything would go so much smoother and quickly. I'm here to try to help your first tiling experience be a success from the start. <3
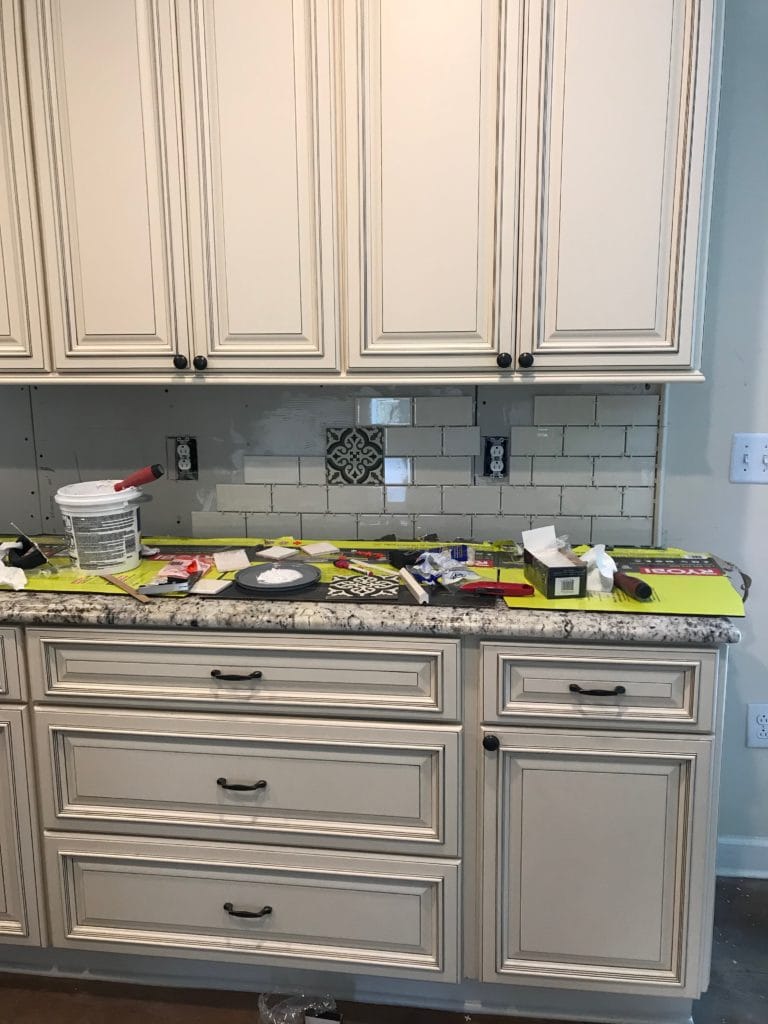
Your tile might tap off easily or it might take the entire wall with it
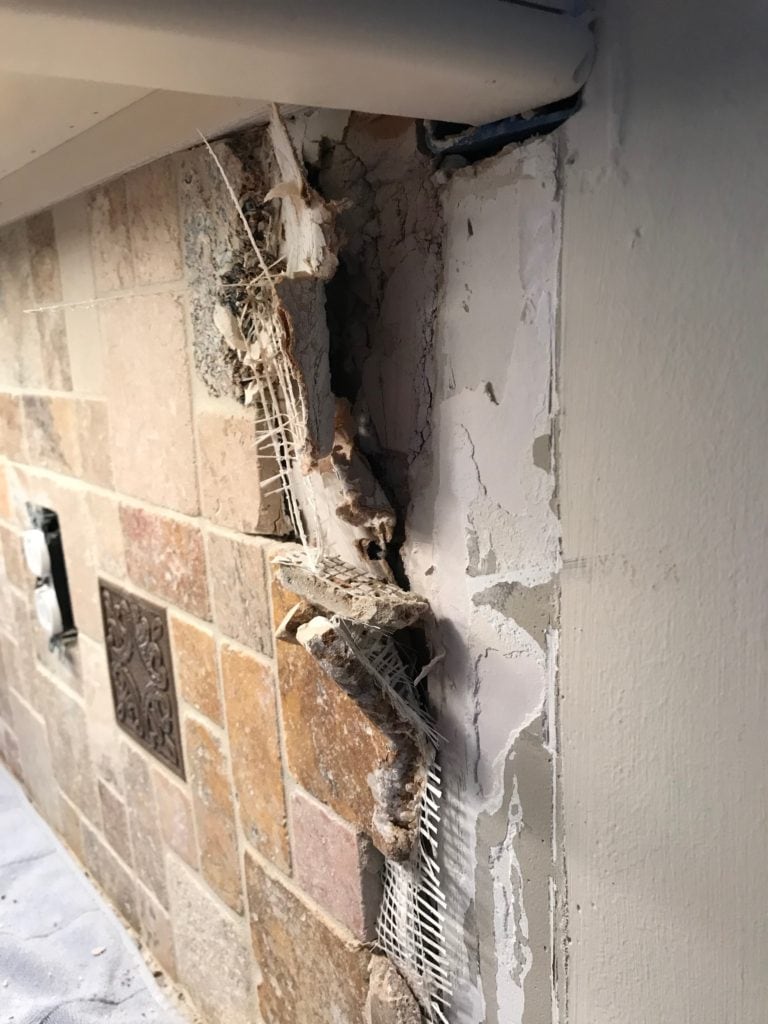
This is where the problems first began. I watched a few Youtube videos demonstrating how even tile applied with "extremely strong thinset" were tapped off using a spackle knife and hammer only taking a small portion of dry wall with it. This was not my reality.
If you're like my husband and wondering why we didn't just go more shallow right behind the tile, I promise we tried. For a long time. I think it was the mesh that made that virtually impossible.
There are even Youtube videos demonstrating how to remove tile and not damage the dry wall. They use techniques like hammering all over the tiles to break them into little pieces. That didn't help in our case.
One problem was that the previous tile had been mesh mounted making it almost impossible to remove an individual tile. It also was apparently applied with a tile adhesive possessing the strongest forcefield known to man. After removing the trim pieces fairly easily, we found that the dry wall was much weaker than the existing backsplash. The dry wall caved in as soon as we tried to apply pressure to remove the tile. Fantastic.
I'm really not sure what I would have done if I had started this project on my own. I'm grateful that my parents were visiting to reassure me that this was all going to be worth it. And to also teach me how to apply new dry wall. After hours of trying to chip off tiny pieces of tile and making virtually no progress, I got the encouragement from my dad to just enter demo mode and accept that we would be replacing all of the dry wall.
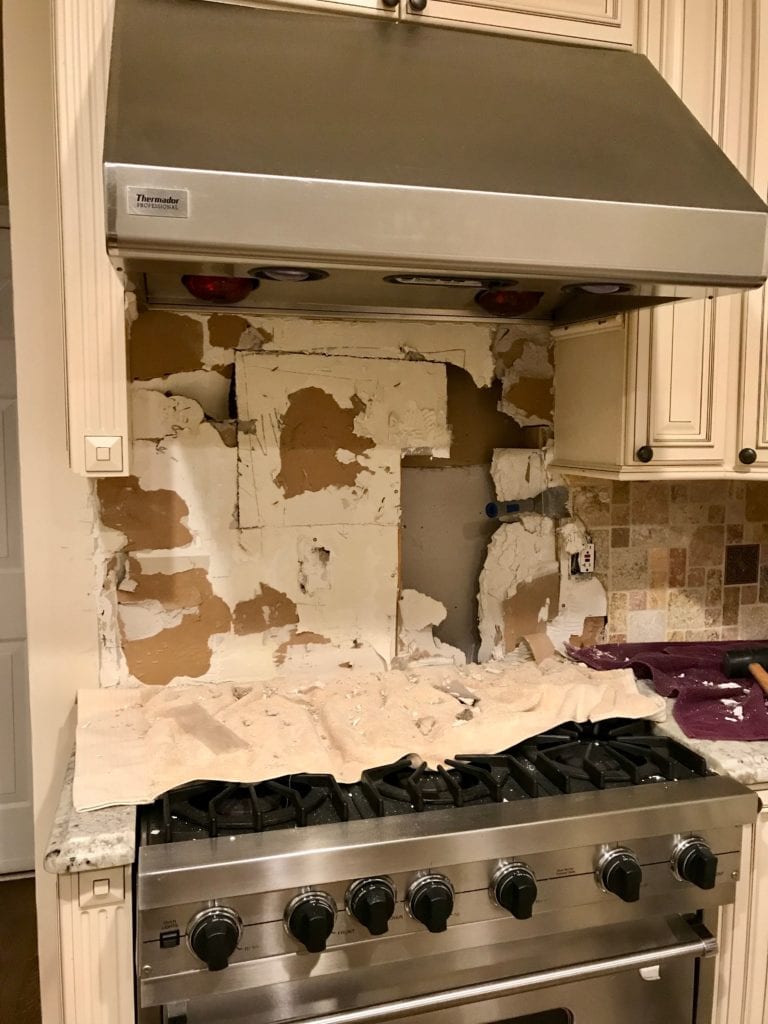
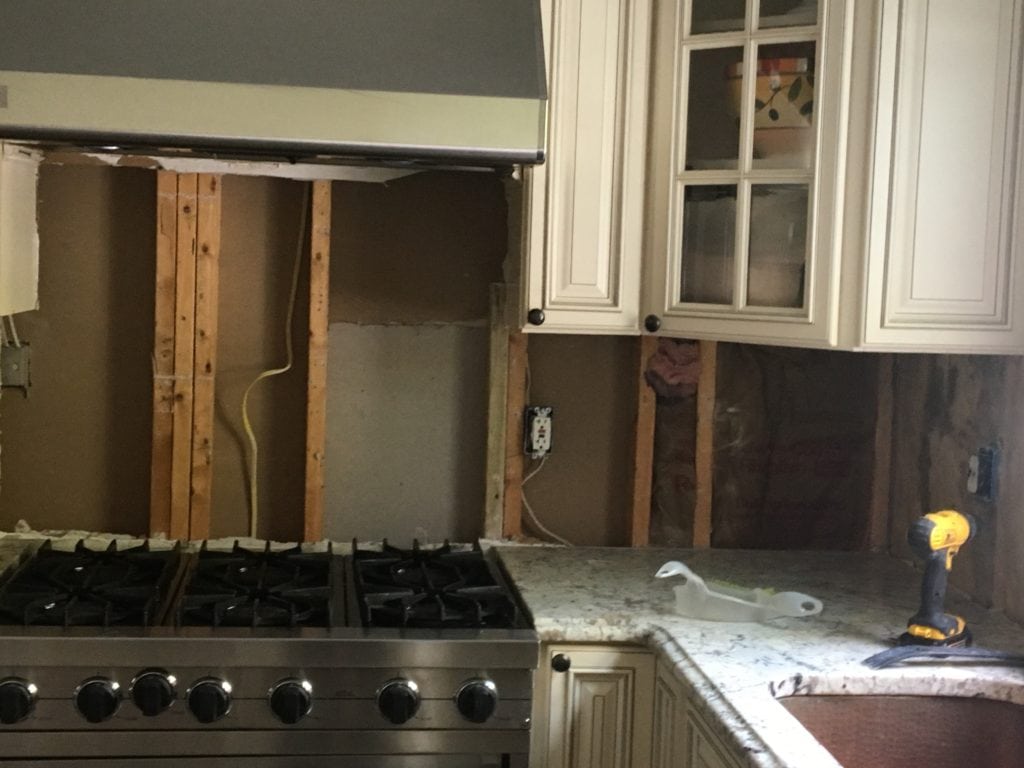
That made for a very different weekend than I had envisioned. I thought I would have time to take my parents to some of my favorite local spots and enjoy leisurely meals and also, oh ya know, put up all new backsplash in my kitchen. Hahaha. In reality, even once we entered demo mode it took the rest of the day to remove the backsplash and all of Sunday to apply the dry wall. I had set a goal for myself to reach the corner before calling it quits on Saturday night, so when a chunk of tile much larger than any we had been getting came off in one glorious piece we were all a little bit excited.
I wish I could tell you how to determine if your tile is going to come off easily versus turn into a nightmare before you've started removing it, but I don't know.
What I can tell you is that for the smaller side portion of my kitchen I decided to just apply the tile over the existing backsplash. After doing some research, it sounded like this was okay to do if the existing backsplash was in good shape. I removed the trim pieces that were raised more than the other tiles and simply put the tile adhesive straight onto the tiles.
This was SOOOO much easier. Do I wish I had used this technique with the rest of the kitchen? Let's not talk about that. It still would have been a challenge over the stove because the accent portion also had raised trim...so let's pretend this wouldn't have been an option. You do end up losing a little bit of counter space by adding onto the existing tiles, but for the side area that wasn't a big deal to me.
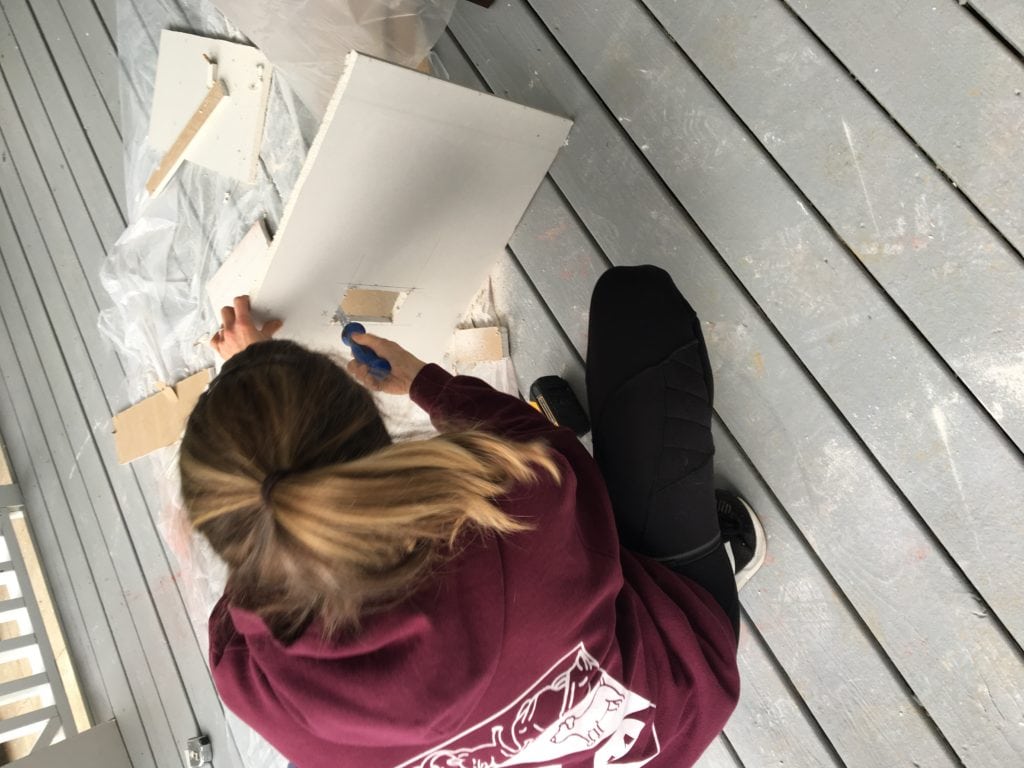
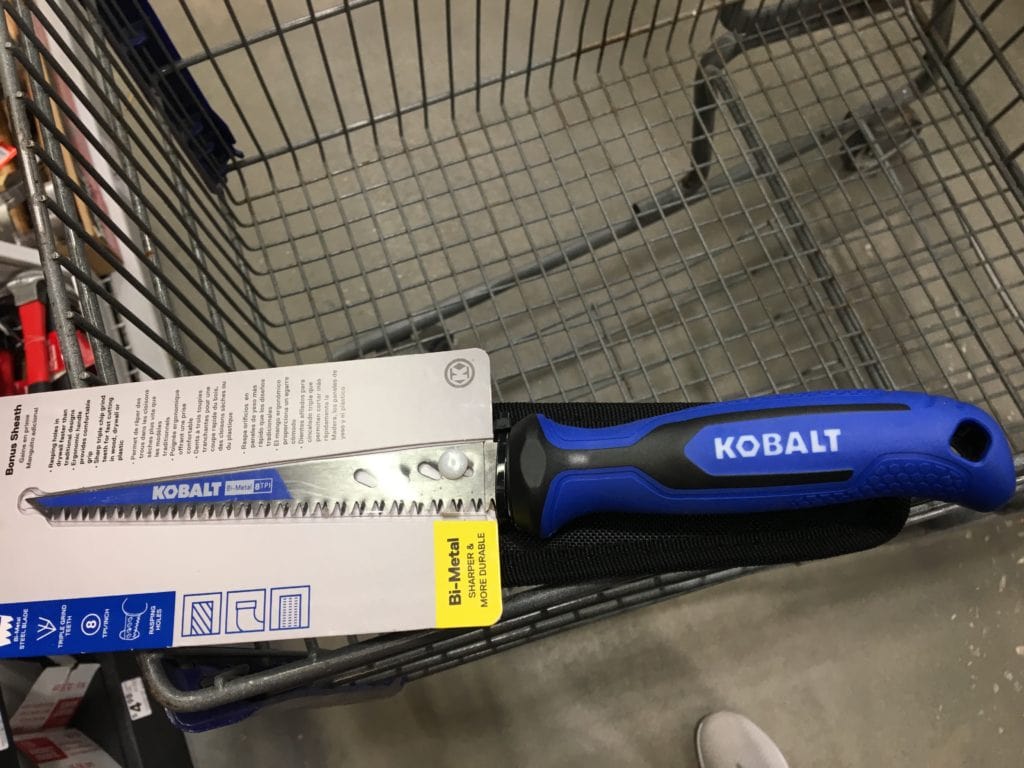
I'm not going to give much advice on applying new dry wall because 1) I hope you don't encounter that situation in the first place and 2) I am most definitely not an expert. If you have found yourself in that situation the good news is that dry wall is very inexpensive. Except for your precious time. I highly recommend a keyhole saw for cutting the pieces out for the outlets. I also recommend considering hiring a professional.
So many tools...
During this project, I acquired just about every tool you may need to cut tile. This made this little DIY project much more expensive than anticipated. Hopefully some of the tools will be useful for future projects, too. If you're applying backsplash to an area that has a window or outlets, you're going to have to get comfortable with cutting tiles.

Initially, I purchased a wet saw thinking that would be all I needed. I pretty quickly lost enthusiasm for it when it chipped just about every tile I tried to cut. "Pro" tip: If you purchase a wet saw, invest in a better blade than the one that it comes with right off the bat. This will save you many ruined tiles and your sanity. If I had purchased the diamond tile circular saw blade from the start, I may not have needed some of the other tools.
Once I had a functional blade, the wet saw was most helpful for shaving off small amounts of tile. For example, I needed about a half inch shaved off the top of all my tiles in order for them to fit right under the cabinet. The wet saw did that perfectly. It was also really helpful for cutting the trim that went around the accent squares at 45 degree angles so that they could meet at the corners. Both of those cuts I had hoped to just hire a professional to do, but I literally could not find one store that offered that so I was forced to become the "professional". Lowes does cut tiles, but only if you have purchased from them. They didn't have a single off-white subway tile when I was looking, so I had to purchase the subway tiles from Home Depot.
Even once I had a great blade for the wet saw, this snap cutter was by far my favorite tool. For only $24, it's super easy to use and makes nice clean breaks. I wish that was all that I needed, but my kitchen has a lot of outlets and cabinets that needed smaller cuts or very small amounts shaved off which this tool wasn't able to accomplish. Any time I could use the snapper over the wet saw I did. Mainly because it's not noisy and messy, I could use it indoors, and it's quick.
For making small cuts into the tile I ended up purchasing a Dremel. I walked into Lowes planning to get an inexpensive angle grinder and blade. I ended up walking out with the more expensive Dremel hoping to be able to use it for a greater variety of things in the future. (In reality, I walked in, talked to some employees both in the tool and tile section who had no recommendations, went home to do more research, went back in still unsure which I wanted to get, and finally ended up on the Dremel).
In order to cut the ceramic tile I needed to get the special diamond grit cutting blade. While it worked well initially, the blade did get dull pretty quickly. I went through two during this project (not cheap).
My last little favorite tool was a simple tile file. I definitely recommend getting one of these. It's perfect for smoothing edges. I also really loved the rounded side which was helpful for creating little round sections to fit around our window and cabinets.
Ceramic dust makes awesome DIY dry shampoo
With all that tile cutting, there's going to be a lot of ceramic dust everywhere. The good news is this serves as a DIY shampoo on steroids - hello volume! This is also a nice bonus since you likely won't have time to wash your hair.
You can't start tiling wherever you want
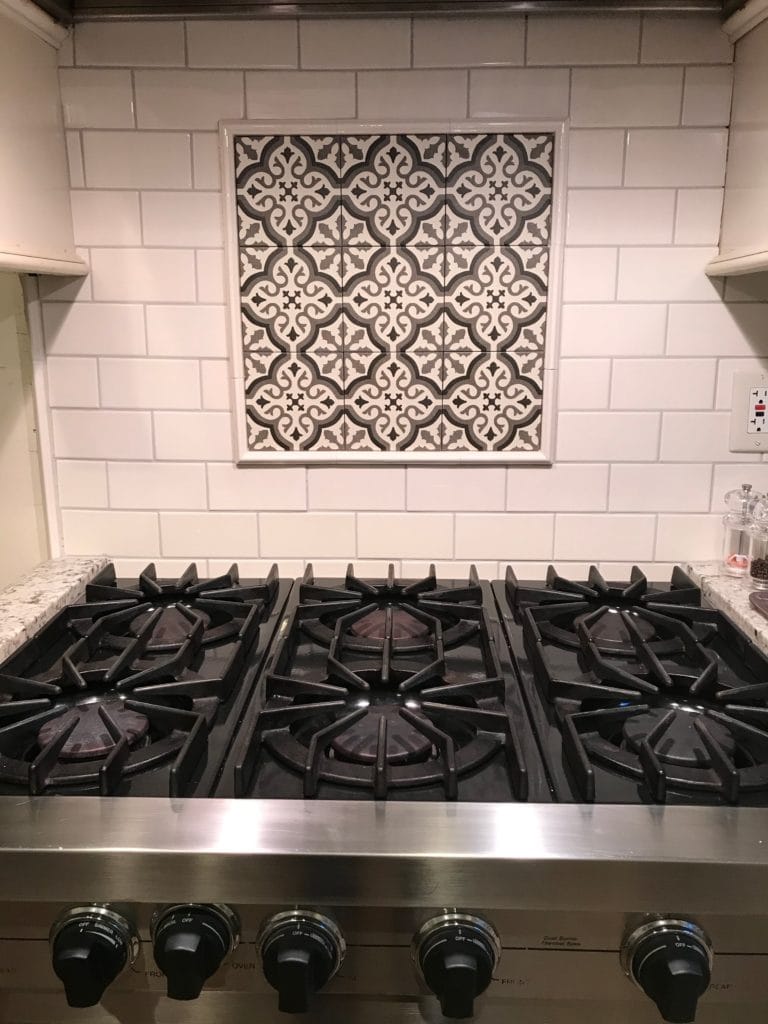
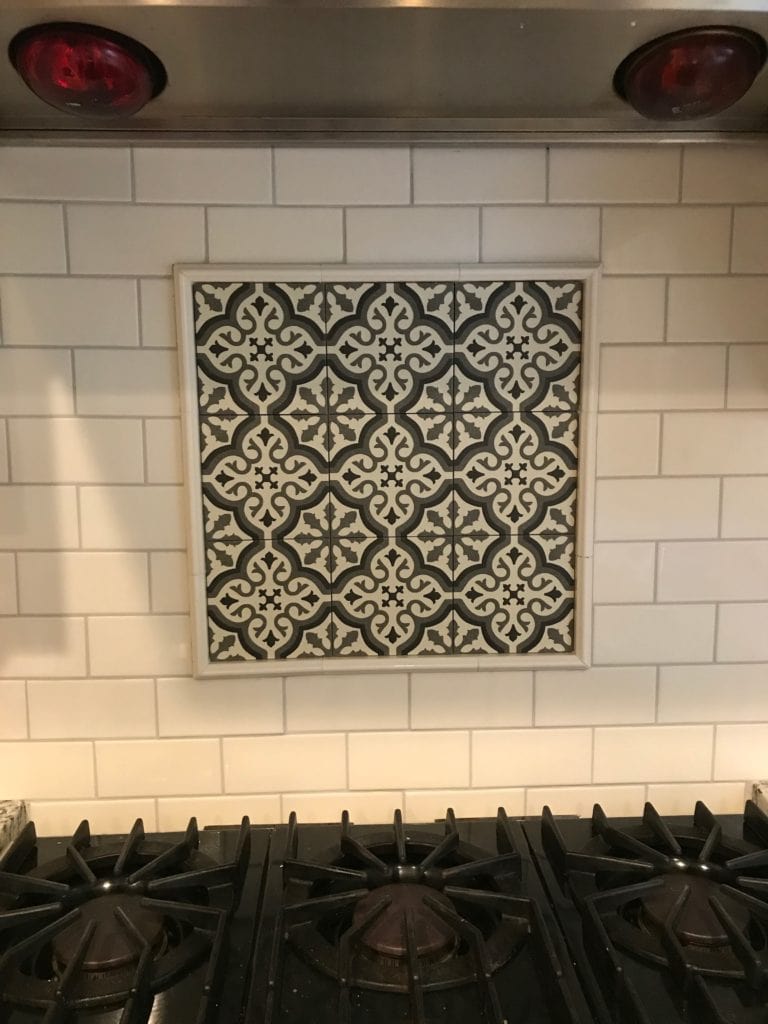
I was excited about the printed ceramic tiles that were going to go above the stove and used as accent pieces. I envisioned just putting those onto the wall first exactly where I wanted them, putting the trim around that, and then laying all of the subway tile. Lovely fantasy, but it doesn't work that way.
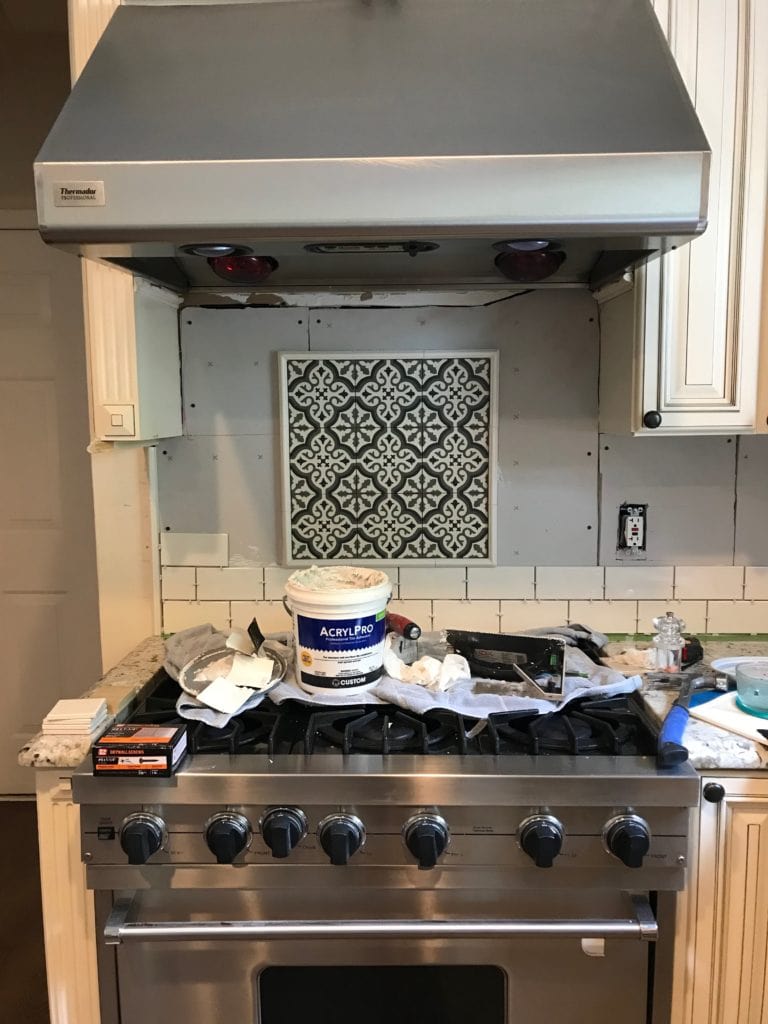
Two important concepts in tiling: you need to start from the bottom and the tiles need to be supported by something. While the tile adhesive is strong once it dries it does take some time to set. When the tiles are first put on the wall they will slide a little if they aren't supported by something. If you're only tiling above a counter and didn't make it complicated with accent pieces this isn't a problem and you're lucky. But if you're going behind a stove or a spot where the counter stops you'll need to put a temporary piece of wood along the bottom that is level with the counter.
I wasn't about to try moving our oven, so I ended up finding a piece of wood and cutting it so that I could wedge it in-between the counter snug enough that it wouldn't slide and I didn't have to nail it. Pretty sure if you talk to any contractor they would have a different technique, but it worked.
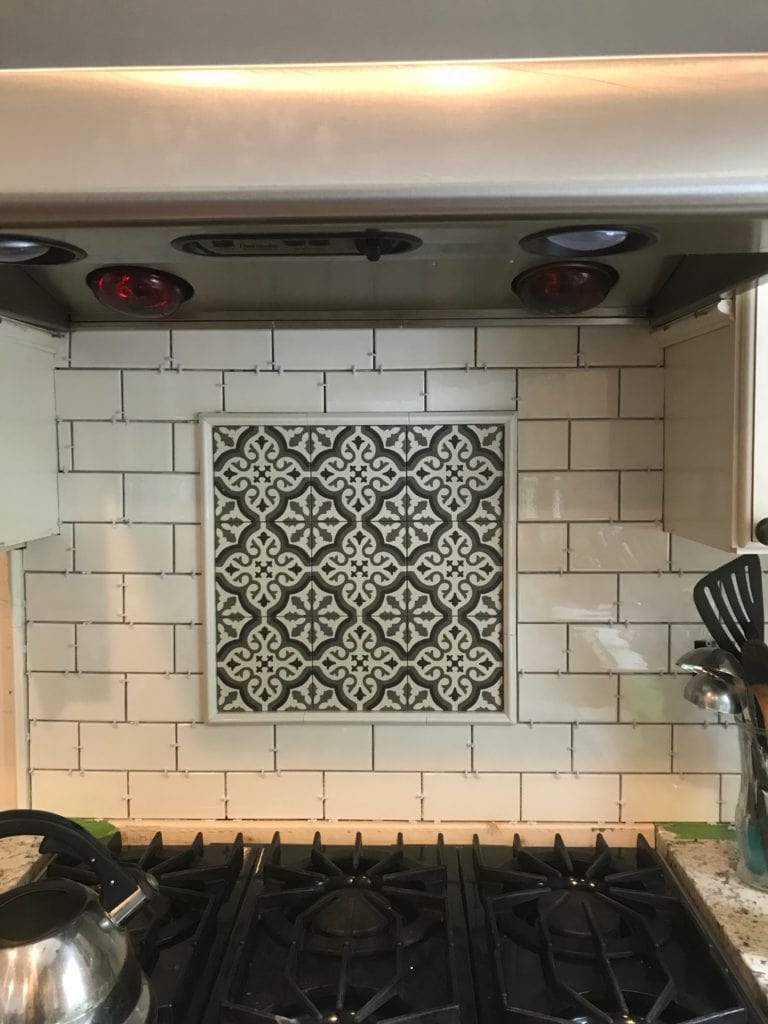
Speaking of different techniques, I wanted it to look like the tiles continued on behind the stove. So once all of the tiles were set and I removed the board I did place another row of tiles under the first row without any support. I used the special technique of asking your husband to hold a couple of pieces of tile in place while they dry.
Do this at your own risk. He may get a little frustrated when they slide around and the spacers keep falling out. BUT you avoid struggling to nail a board behind your oven (I really didn't want to move our oven). This technique takes much longer and isn't as precise (obviously). I wouldn't recommend it unless it's in an area that you can't really see and it's only a small space. And if the alternative seems like a much bigger project and you've had it already with the extra steps.
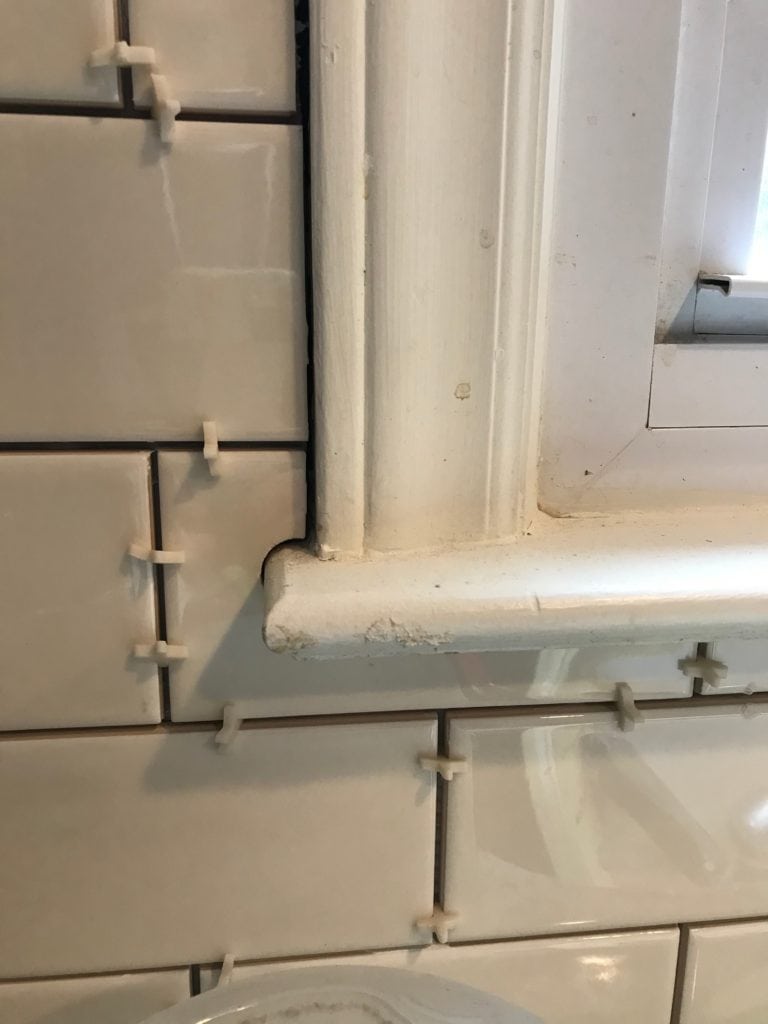
The other important thing to know is when you start at the bottom you need to include a spacer between the countertop and your first tile. You'll be caulking there which allows for natural movement of the house overtime so all of your tile work stays nice and safe.
Since I couldn't put the accent pieces up first I used duct tape to hold them in place while figuring out spacing. After, I left them there as a place holder. This technique worked pretty well even though the tiles I chose were heavy.
It's good to plan ahead
A little planning before you start to tile goes a long way in preventing future headaches. Surprisingly, this is one thing I did not learn the hard way.
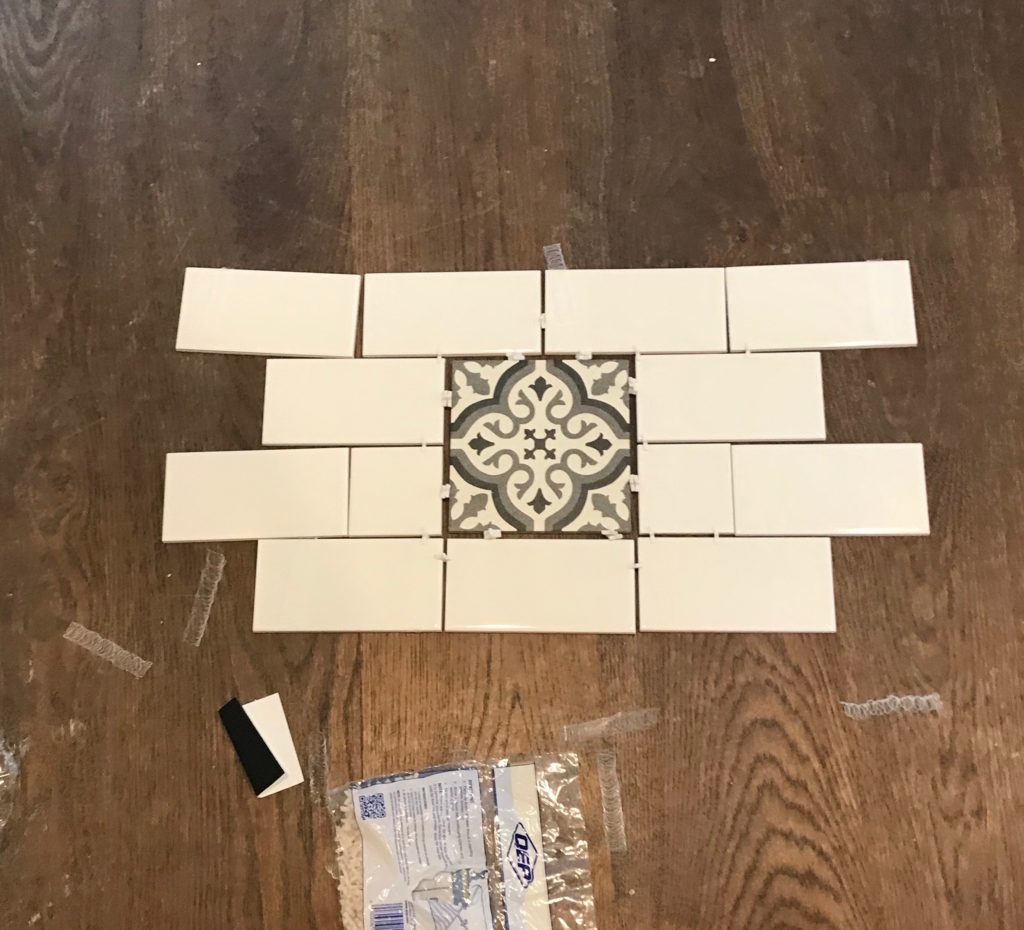
Before starting, I measured to see how many tiles would fit vertically. I also used the spacers to see how the subway tiles would line up with the accent tiles. This helped me know that I was going to need to shave off a portion of the tiles on the top row to fit. I also found that I was going to need to use two spacers around the accent piece in order for the rows above and below to continue without needing to be cut.
Another decision when planning is if you want to start in the middle of the counter or at one end. I decided to work at the end that had the trim so that it had nice even tiles (3"x6" and 3"x 3") starting the traditional offset pattern.
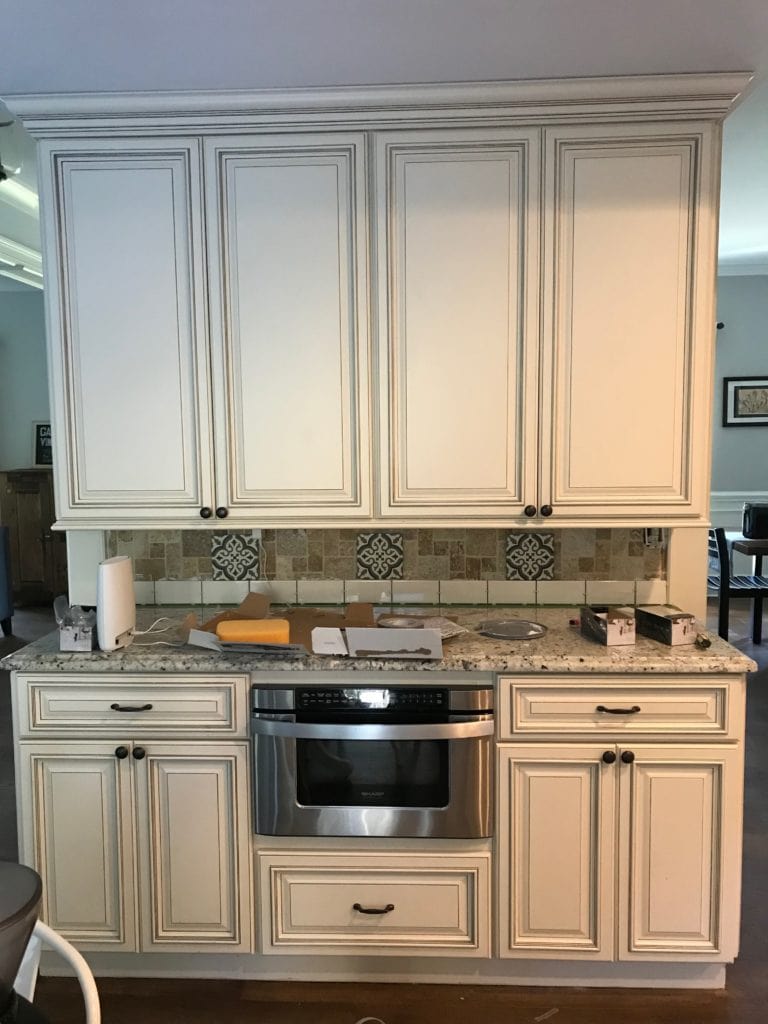
For the smaller side portion of my kitchen: if I was to do it again I probably would have started in the middle. Starting in the middle would have helped it to look more symmetrical, but whatever. By this point, I just wanted to be done tiling. Aside from figuring out how many accent tiles I wanted to use and their spacing I didn't do much planning. Another tip should probably be to not work on the project when you're feeling like you want to rush. You're going to be looking at that tile for (hopefully) a long time, so you want to love it and not critique it every time you look at it.
You should turn your circuit breaker off when working around the outlets.
I'm not naming names, but one of us may have been shocked while grouting. This is funny to me only because everyone still has their fingers and a beating heart. HOWEVER, it's worth taking a second and turning off the electricity when working around the outlets. For real.
Choosing grout is less straightforward than you might think
I was so happy when tiling was finally finished. I figured it was smooth sailing from there. How complicated could grout possibly be? Obviously complicated, Amelia.
From my online research, I knew that I was going to need sanded grout because I had joint spaces 1/8" and larger. But not so fast. Mix your own or pre-mix? Have one that needs to be sealed or use a pricier all-in-one? Which ones have the best color consistency? Did I want stain resistance? Acrylic instead of sanded? Oy vey.
Reading online reviews was confusing. The kind that you mix on your own seems to be easier during the application process because it takes more time to dry (so it's easier to clean). However, there seemed to be a lot of issues with color consistency. That seemed to be from user error during the mixing process (not mixing well or adding too much water). The pre-mix variety helps to avoid user error and allows you to start grouting immediately but dries much faster. The quick drying time seemed to create a lot of frustrated DIYers who were dealing with a haze that was hard to clean off the tile.
After a lot of deliberation, I ended up going with Lowe's premix acrylic grout: MAPEI Flexcolor CQ. Home Depot has a similar version, but from the reviews the MAPEI seemed to be less frustrating to work with. One thing I did find frustrating were the color options.
Selecting a Grout Color is a Tough Decision
Originally, I wanted a medium gray like the silver gray or pewter. MAPEI has tons of gray options. However, it's important to note that if you want a color beyond the three stocked in stores the price DOUBLES. Lame. The only grays that they have in stock for the Flexcolor CQ are charcoal, pearl gray, and warm gray. The first two are dark grays and the third is much lighter. I was worried that I was going to need two buckets of grout for our project. I didn't feel like waiting on a special order or shelling out $180 just for grout, so I decided to try the warm gray. (FYI: I only ended up needing one bucket and had a lot left over.)

The nice thing about Lowes is that if you don't like something, you have 90 days to return it. Even if it's opened. Once I confirmed that, I brought a bucket home and created a sample using left over dry wall and tiles. I highly recommend doing this so that you can 1) see the color before it's permanently on your wall and 2) play around with how to apply the grout and see how quickly it dries.
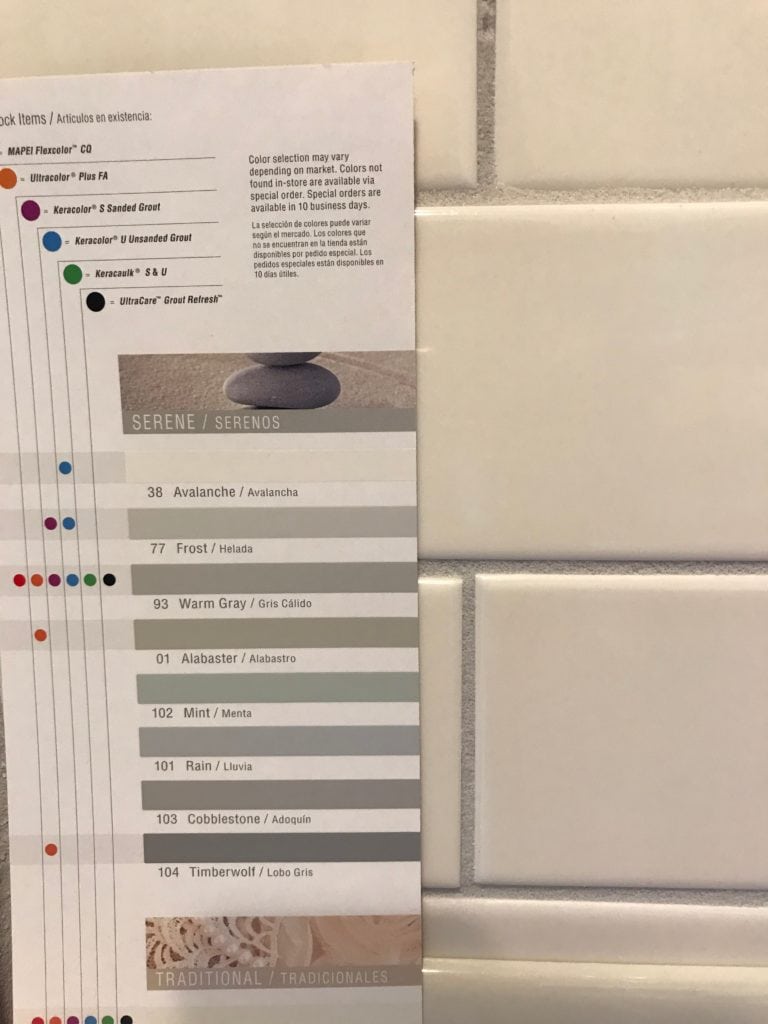
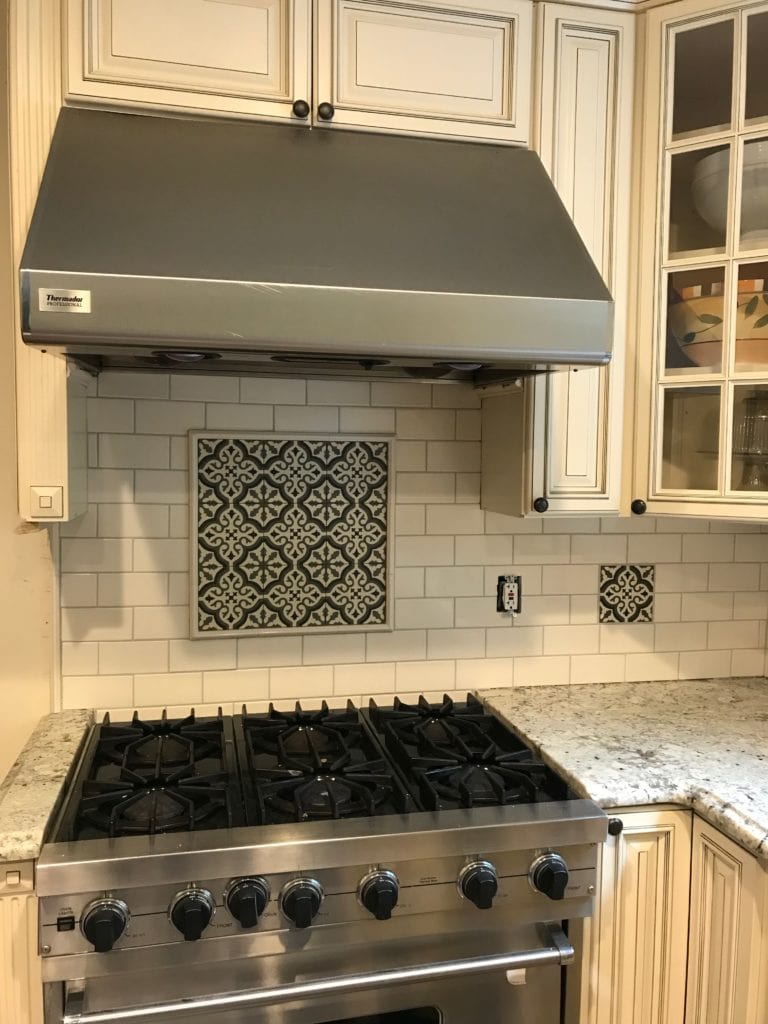
I ended up really liking MAPEI's warm gray. It coordinates really well with the counters and the gray has enough of a tint that it provides plenty of contrast. It was difficult finding info on how accurate the color samples online or on the brochures were compared to the actual product. A lot of the reviews reported colors coming out much lighter than the sample shown, so I was worried warm gray would be more of a white. I actually think the color online is a pretty good representation. I'm also showing this picture of the color samples next to the real deal to hopefully help someone else in my predicament.
Grout is best done with a partner
While I did the tiling on my own, I'm really glad Matt was willing to help with the grout process. Even with both of us it took around 2.5 to 3 hours. If I had done it alone it probably would have taken significantly longer.
I had planned on tackling the project on Sunday, but at around 9 pm on Saturday I asked Matt if he just wanted to get it done then. How's that for spontaneous fun on a Saturday night. "Want" was probably a poor choice of words, but Matt agreed. By the time we were all set up for it (and had finished an episode of Schitts Creek), it was 10 pm. We finished around 1 am tired, mildly cranky, but grateful that our Sunday wouldn't involve grout.
Since the MAPEI Flexcolor CQ grout dries pretty rapidly, it's helpful to have one person applying the grout to a somewhat small area (maybe going about three feet ahead) while the other person cleans it off. We allowed the grout to dry for about 5 minutes before I started to rinse it off. Things to know about rinsing:
- Use 2 large buckets of water for dipping the sponges into and change them out for fresh water frequently. You really can only do one pass with each side of the sponge before you need to rinse it. If you don't or if you wait too long before changing buckets with fresh water you'll end up smearing diluted grout around the tiles which will create the haze you're trying to avoid.
- The Flexcolor CQ container comes with a nice sponge inside. Surprisingly, this sponge was much better than the other orange ones that we purchased, so if there's only one person rinsing you could probably stick with just that.
- I found it helpful to use a microfiber cloth (dry or slightly damp) to clean off any residual haze afterwards. I waited at least an hour before doing that.
Caulking Isn't as quick as you'd think
There's good news/bad news here. The bad news is this is kind of messy, and if you're a perfectionist this is going to be frustrating. It's not very easy to create a nice consistent line. The good news is if you like TWSS jokes you're going to have ample opportunities for them during this portion of the project.
If you end up using the same MAPEI Flexcolor CQ grout that I did you'll want to get the matching caulk. This seemed like it would be simple. It wasn't for me, but I'm going to help you out. The matching caulk comes in MAPEI Keracolor S (sanded) and U (unsanded) versions. Since the Flexcolor CQ is an acrylic premix it's not really sanded or unsanded. After consulting with a Lowes employee, the S version matches the flexcolor texture best - so go with that one!
If you're completely new to all of this, you should also know you need a caulk gun in order to get the caulk out. We realized this once we got home. That was a wonderful realization because I had already been to two different Lowes stores to find the specific caulk I needed. If I haven't completely scared you away from this DIY project, I recommend using the list below and adding all the items to your online cart (these aren't affiliate links) and doing an online pick up. Hopefully that will save you precious hours/days of your life.
Once you have the correct caulk AND caulk gun, you're ready to go. Caulk allows for some movement, so it should be used in areas of transition (ex: where the tile meets the countertop or cabinets). I think it should also be used in corners. I was on a grouting spree and grouted our corner. You might want to do a little research, but I'm pretty sure I did that wrong. I'm not a caulking expert (lol), so I'm going to stop here.
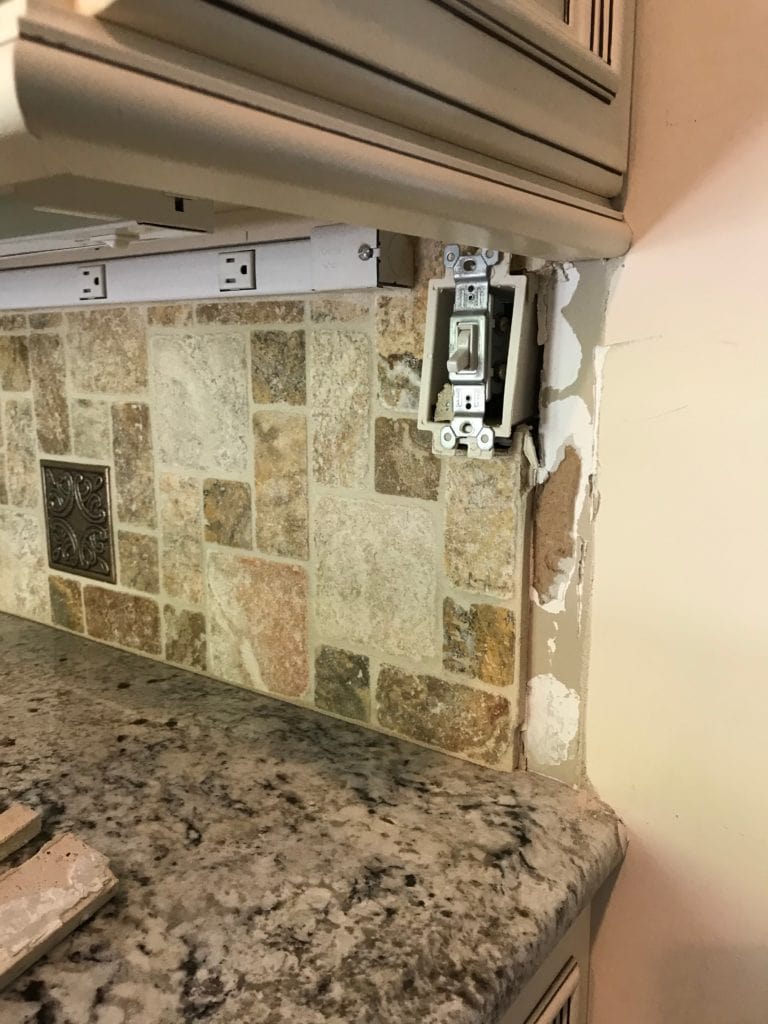
Just when you think you're done...you're probably not
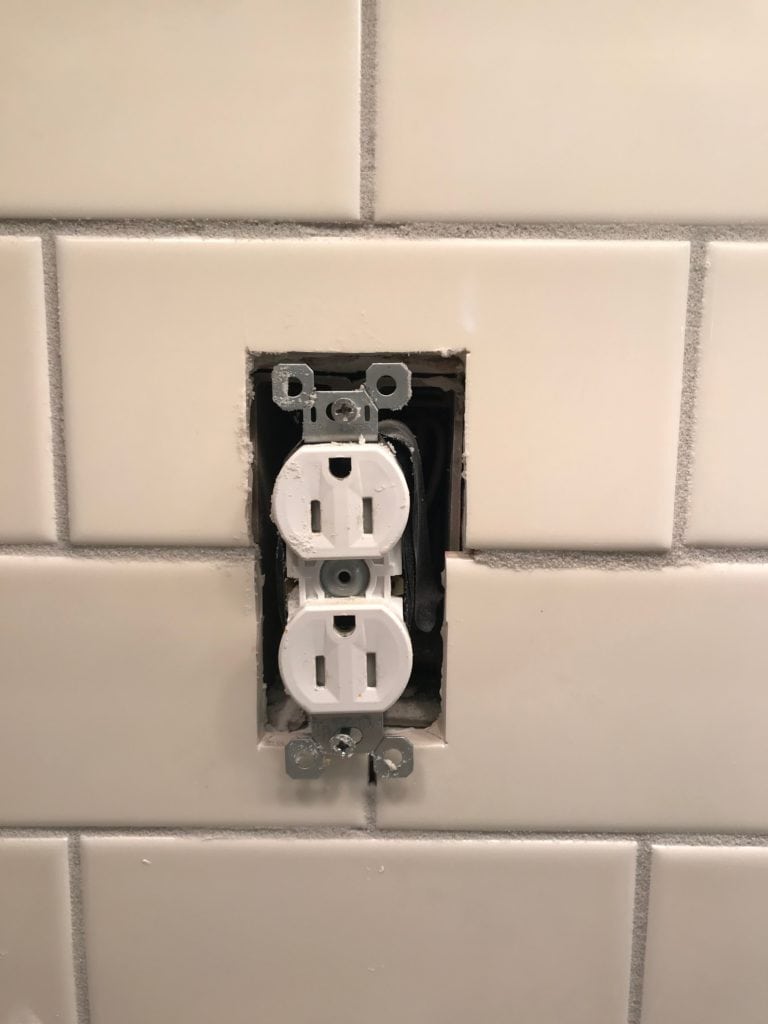
I made it to the FINAL part where all I needed to do was put the outlet covers back on. Finally, a simple and instantly gratifying step! Haha. Not. I had cut some of the tiles around a few of the outlets a little too widely so that the little metal portion of the outlet that is supposed to press against the tiles didn't reach. If the outlet isn't supported by the tiles it's useless because it sinks back into its crevice (definitely the technical term) when you go to plug something in or flip the switch. I know this, because I really tried to avoid another goddamn trip to Lowes by experimenting with ways around it. Turns out, you really do need something supporting it.
Ideally, I recommend avoiding this whole dilemma in the first place by making sure that your tiles are cut so that the original metal portion of the outlet will align with the tile. BUT, if you're finding yourself in a similar predicament I have two solutions for you. Why two? Because I swear I have run into every possible problem you can have during a "simple" tile project. Hopefully this will be to your benefit.
My first solution worked to fix the first two outlets. This silver steel wall plate spacer was perfect for adding just a little more height and width so that the outlet was supported and flush with the wall. It was super easy to install and was only $3 for three. How lucky, I thought, that the bag includes exactly the number I need for fixing my outlets. Nope, said the universe.
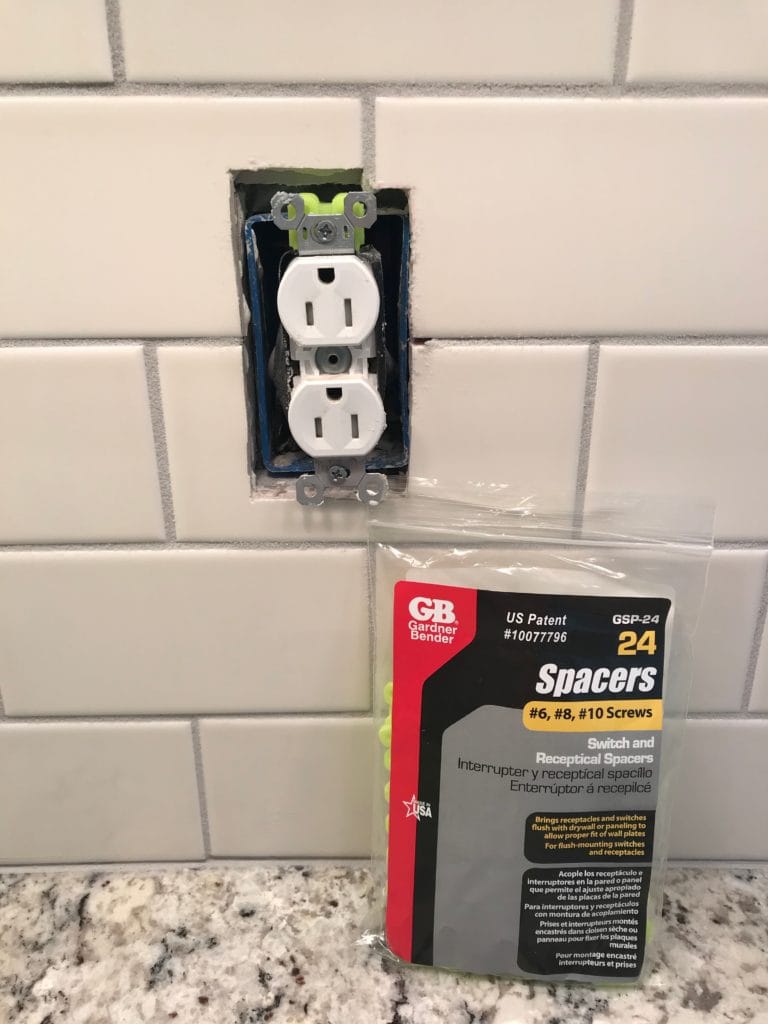
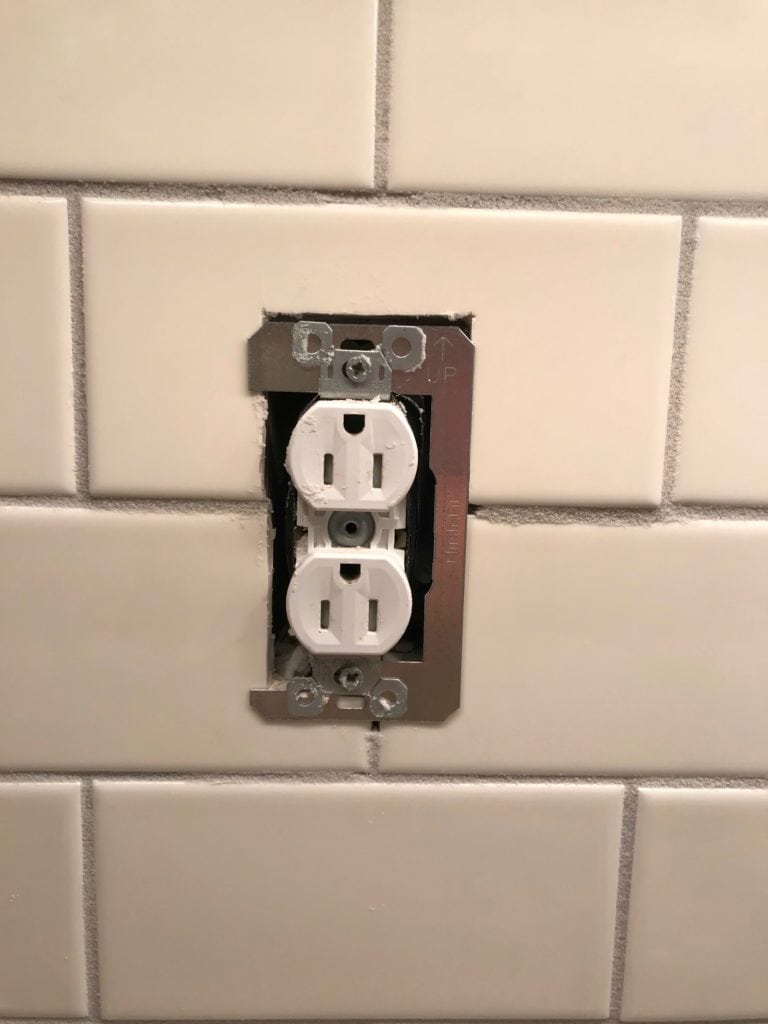
For the third outlet the space was still too wide for the above trick to work. Thankfully, I was starting to see the trend of how none of my plans went as I hoped and I had already purchased a second option: plastic wall plate spacers. These little plastic pieces fold over and snap into each other allowing you to get the thickness you need. Then you just put it behind the metal portion and it supports the outlet so that it can be flush with the tile.
Both of these options are easy to use and effective. If you think your cuts are pretty high or wide, I'd recommend just getting a large bag of the plastic spacers since that should work for most outlet issues. If you were pretty careful cutting, silver steel ones are nice because it automatically makes the top and bottom even and level with the tile.
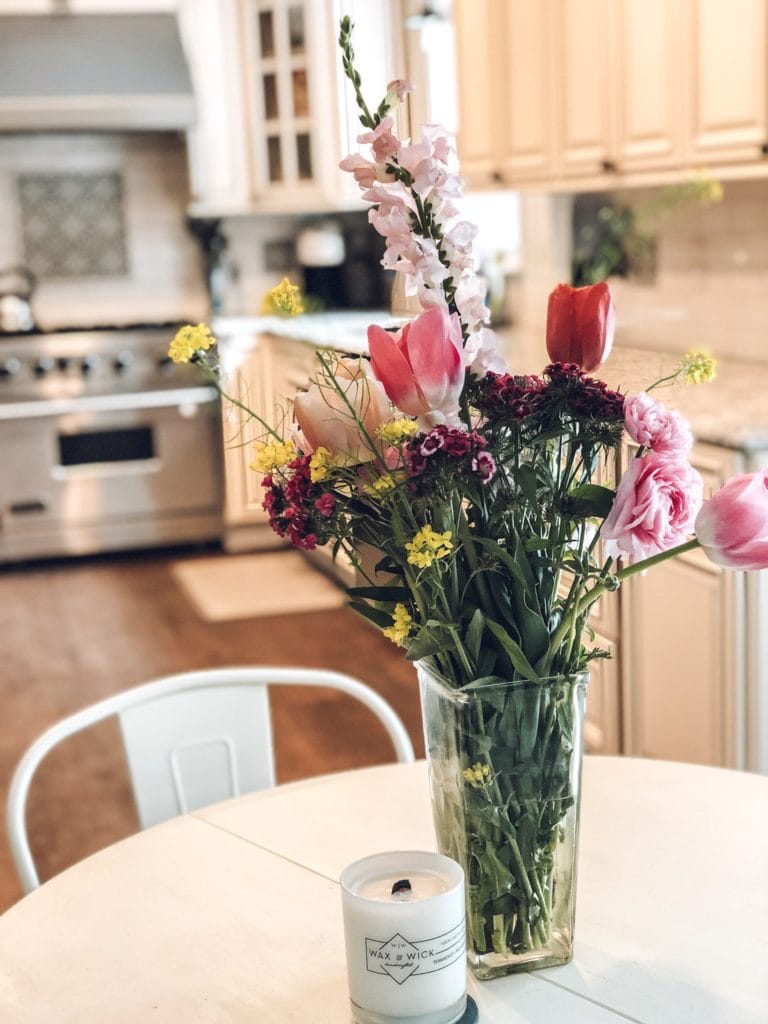
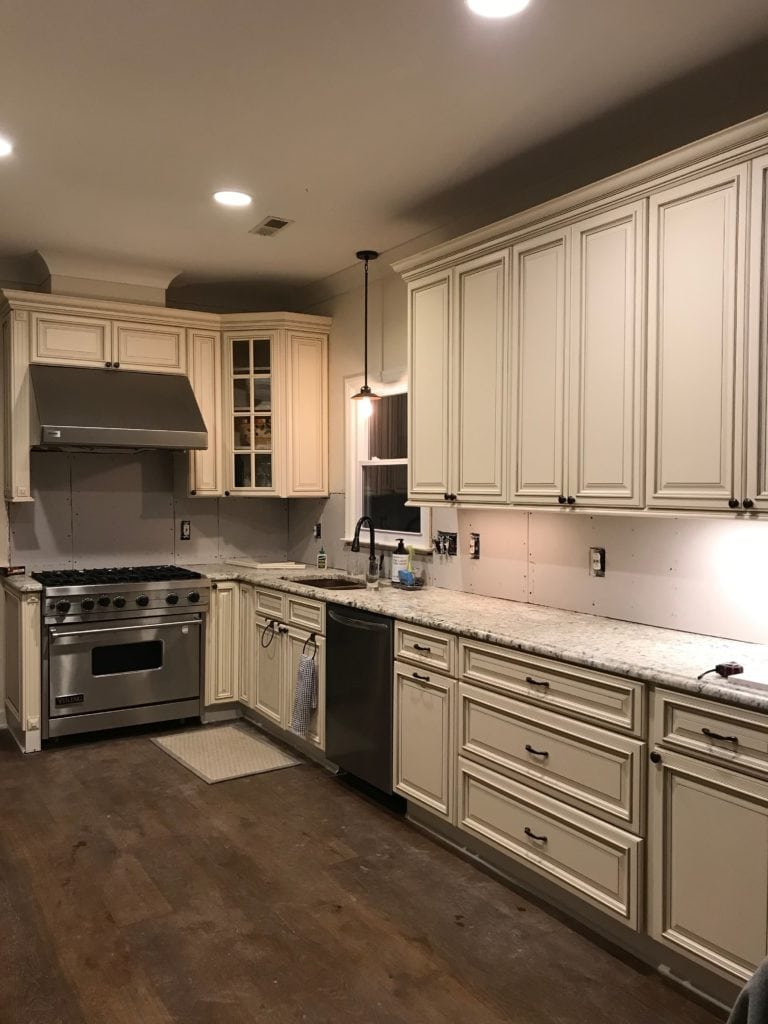
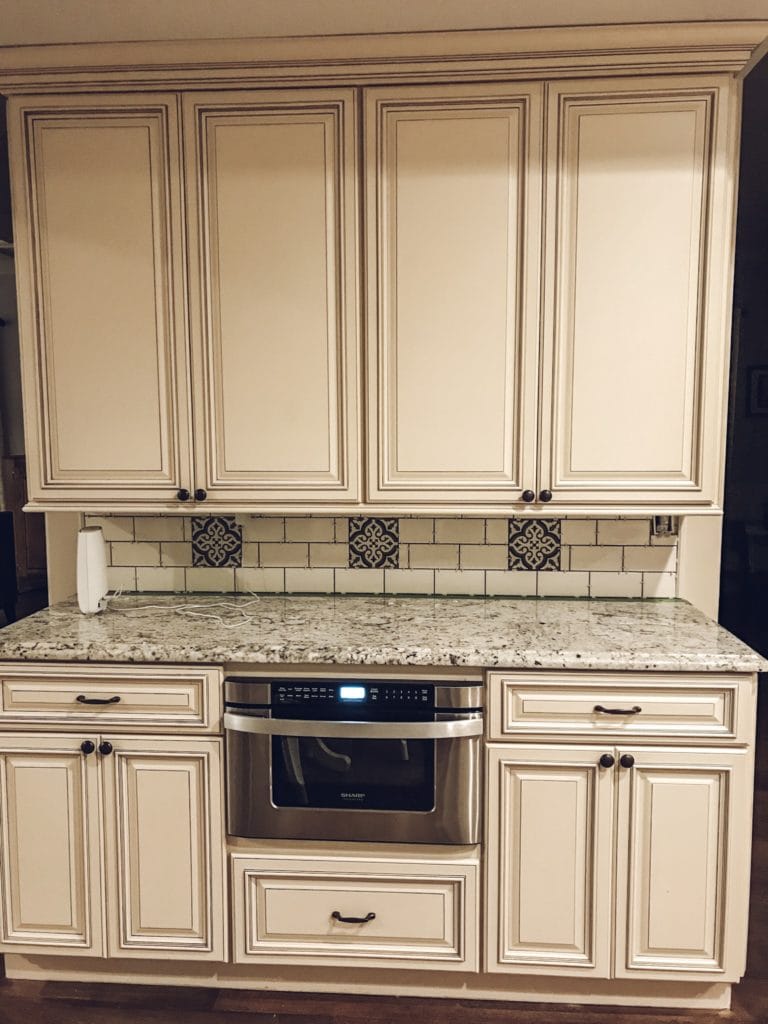
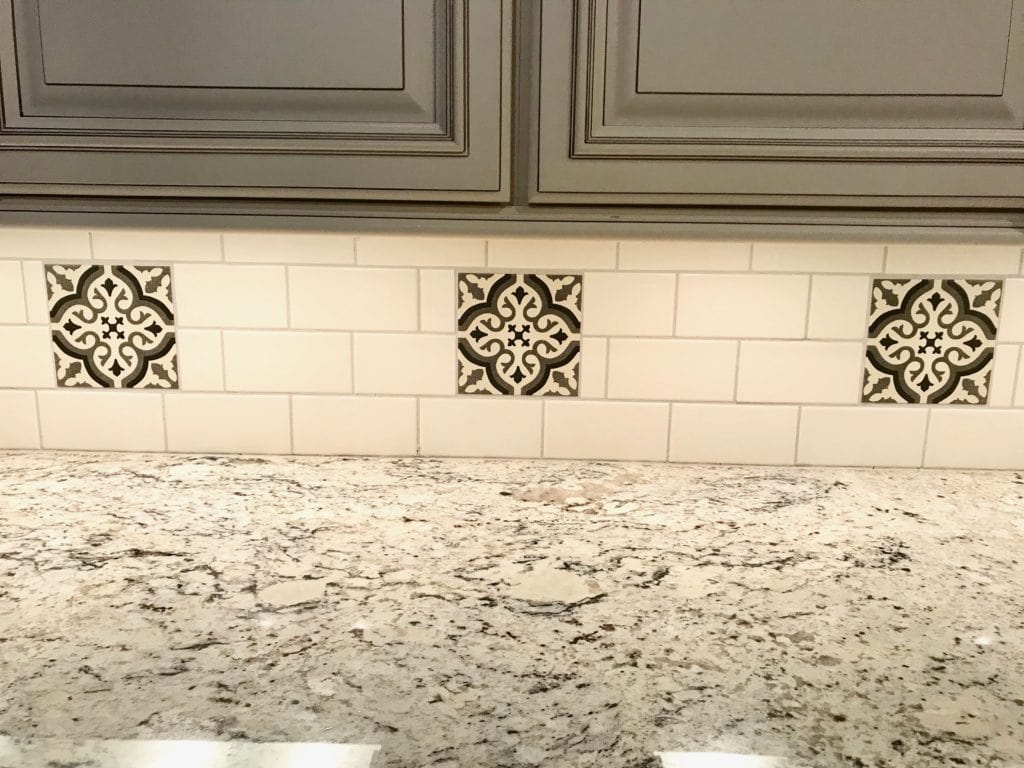
It Feels Really Really Good When You're Finally Done
This project ended up being WAY more involved (and expensive) than I anticipated. However, despite all that it was incredibly rewarding to finally be able to take a step back and admire the new look of our kitchen once the project was completed. I feel like the tile is much more cohesive with the rest of our home. The tile colors and prints also are coordinated with our cabinets and countertops instead of being a completely different color palette.
If you decide to embark on your own DIY backsplash adventure, I hope this post helps to make your project much less stressful and more enjoyable from the start. If all else fails, have fun on demo day. It'll all come together eventually.
Products used:
- Cream Subway Tiles - Jeffrey Court Royal Cream 3 x 6 in. ceramic tile
- Accent Squares - Elida Ceramica Lolita Deco Squares 6-in x 6-in floor and wall tile
- Grout - MAPEI Flexcolor CQ Premix Grout Grout
- Caulk - MAPEI Keracolor Flex Caulk
- 1/8" spacers
- Tile adhesive
Tools:
- Wet saw with diamond blade
- Tile snap cutter
- Dremel with EZ lock diamond blade
- Tile file
- Caulk gun
- V-notch flooring trowel
- 5-in flooring trowel
- Rubber grout float
Outlet cover solutions
4 comments
Leave a comment