Easiest DIY Sofa Table: How to make an inexpensive table when you have minimal carpentry experience and tools
Buying a home and decorating it is a super fun but also a never ending process. We have lived in our house for close to two years, and somehow I still have a project I want to tackle each weekend. Lately, my focus has been on our “bonus room” which is one of Matt’s and my favorite rooms for very different reasons. Matt loves the projector we have for optimal tv and movie watching, and I love the little home gym we’ve created for awesome home workouts. Last weekend tv –watching and fitness collided a bit as we prepared for a little Super Bowl get-together.
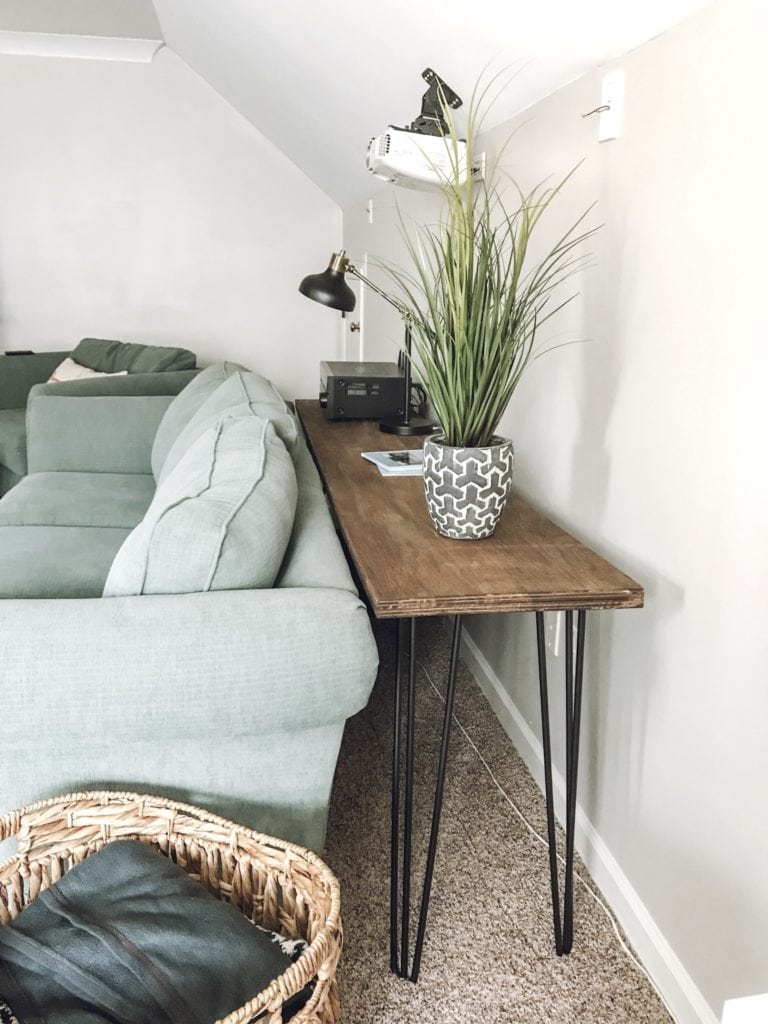
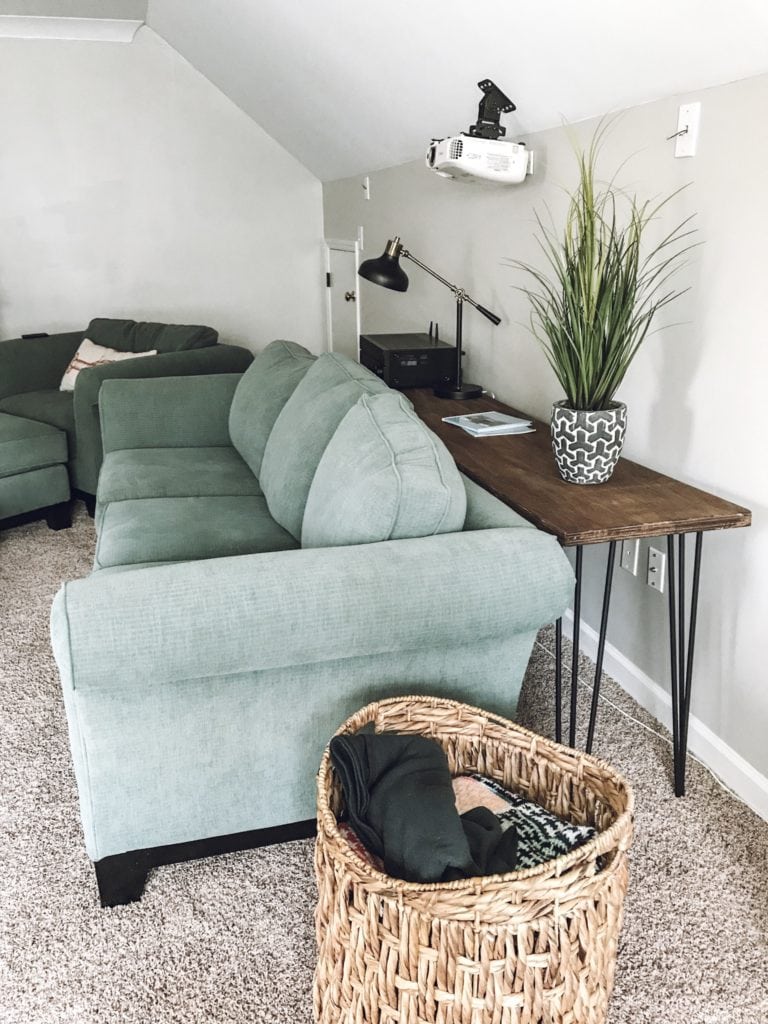
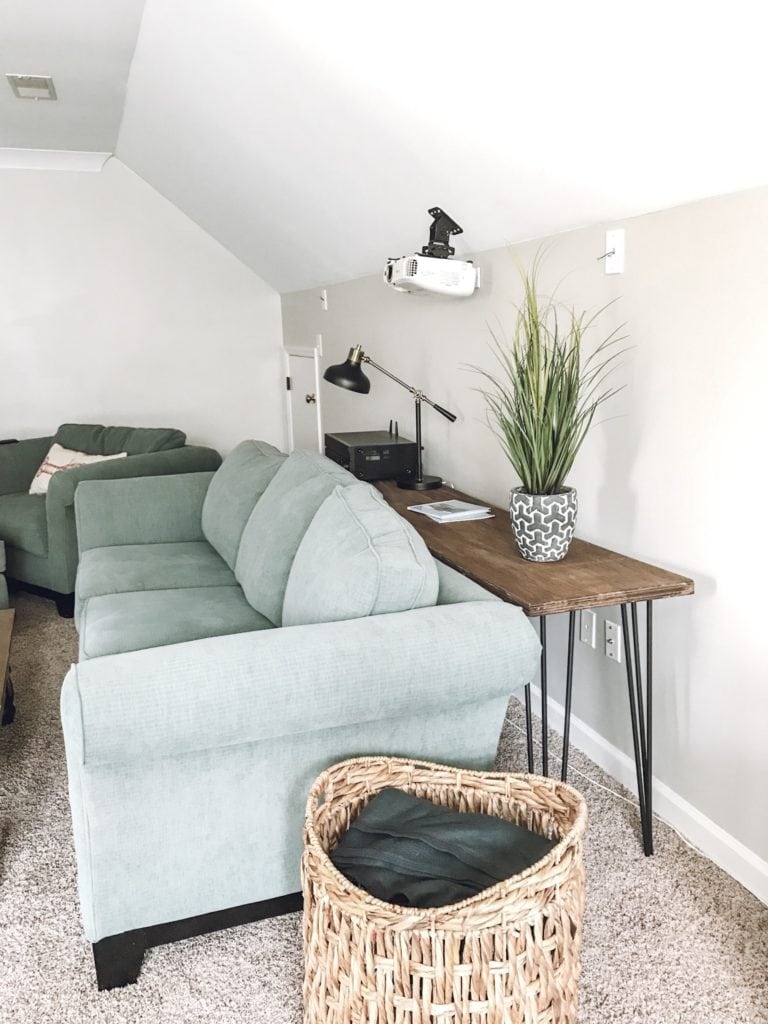
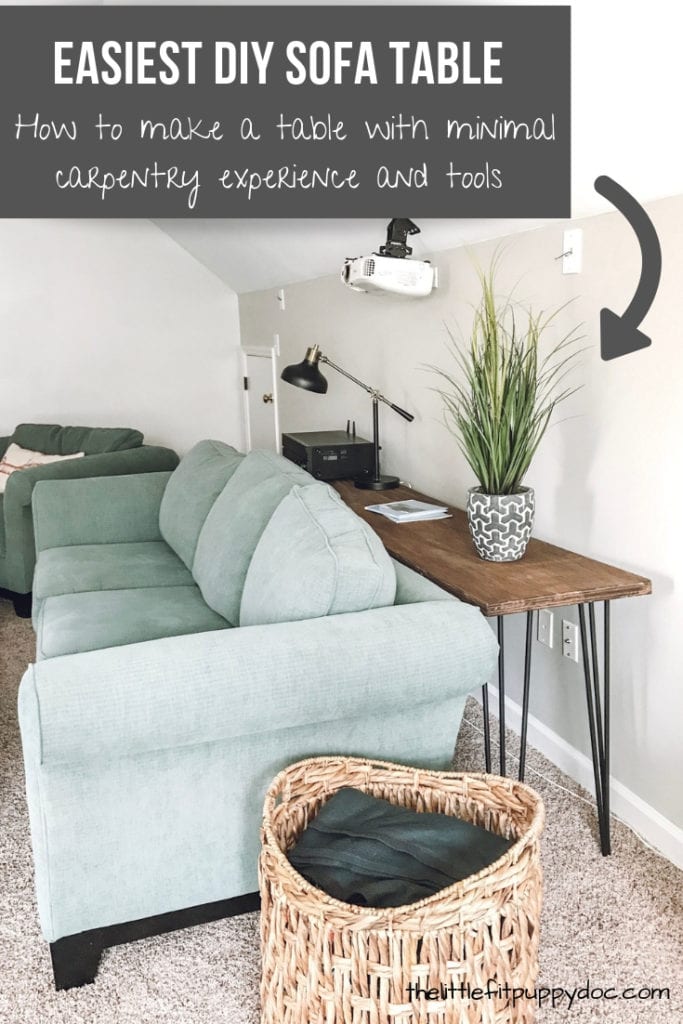
With the Super Bowl comes FOOD, and I’ve been meaning to create a space behind our couch that will be a convenient place to put plates and food. Really, I would prefer to have the couch up against the wall to make more space, but Matt says something about the speakers needing to be behind us for optimal sound yada-yada, so I’m trying to go with it while at least making that space have a job.
I should also mention that the black receiver now sitting at the end of the table had previously been propped up on a lovely cardboard box for over a year. We like to keep things classy. While this isn't a fancy table, it is a step above a cardboard box.
I wanted this to be a fast, simple project. I have plans of making an awesome little workshop space in our garage where I can do DIY projects, but last week I had a lot on my to-do list and I just wanted a relatively cute, functional sofa table fast with minimal steps. I decided to go with a similar technique I used to make the top for my office desk and headed to Lowes (which has turned into our second home since becoming homeowners) to get a piece of plywood.
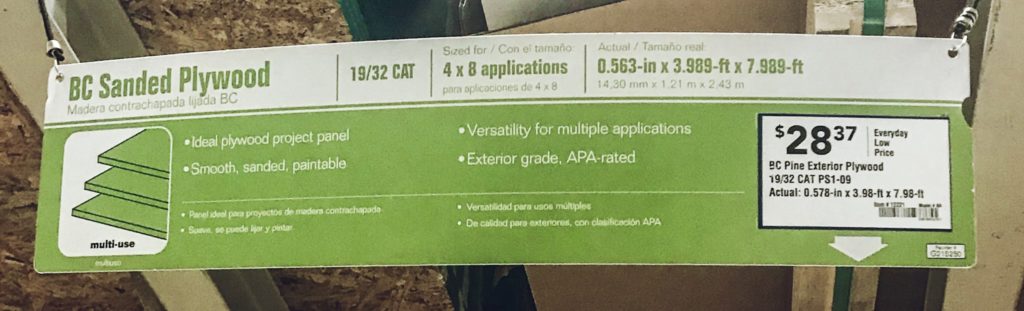
Did you know that Lowes and Home Depot will cut pieces of wood for you? You probably did. But isn’t it great?! Basically, all you have to do is find a piece of plywood that you like the look of and ask the kind Lowes employee to cut it into whatever dimensions you’re looking for. In my case, I needed two pieces that were 7 feet long (the length of our couch) and about 17 inches deep (about the depth Matt wanted compromised on the couch being away from the wall).
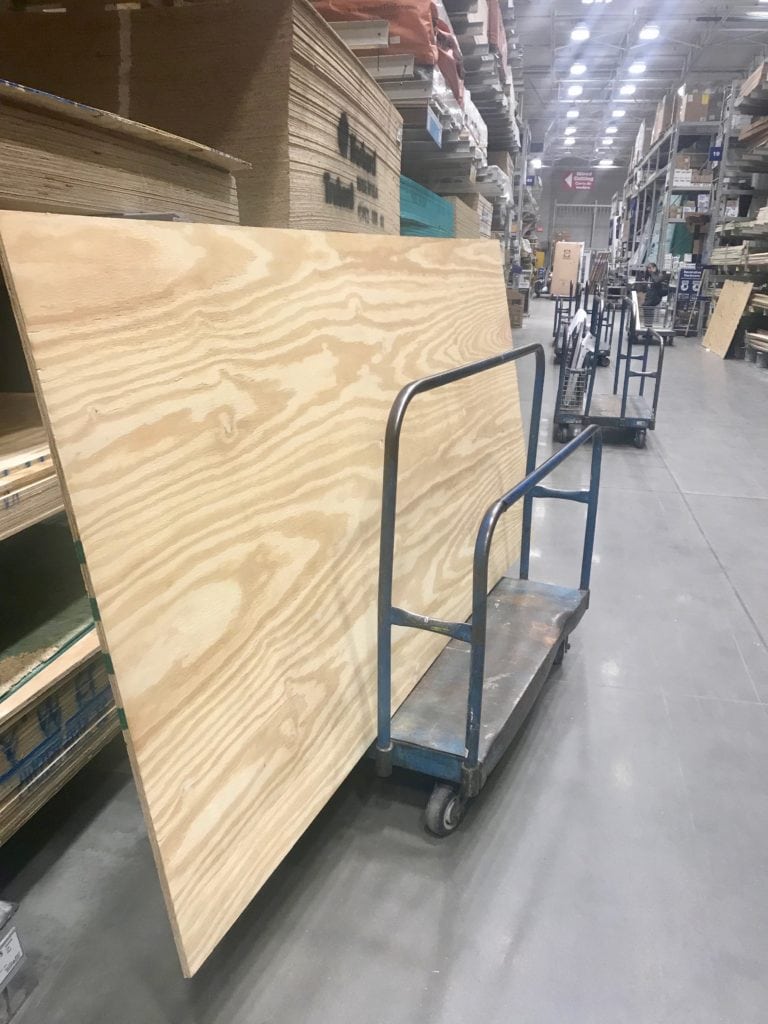
I recommend bringing a friend/husband or asking for help during this Lowes field trip in order to get the giant piece of plywood into the little dolly so you can bring it to the cutting area. I'm stubborn and like to be independent, so I did neither of those. I also don't recommend doing an upper body workout before this trip.
If you're going it alone, you can slowly get the giant sheet of plywood down from the pile above your head until it starts to get pretty heavy but you've already committed and it's too late to turn back. At that point, just get it to the floor without smashing your fingers - it might require some leg maneuvers but you'll figure it out. I then put one foot on the dolly to keep the darn thing on wheels from rolling away while slowly picking up the plywood and sliding it onto the dolly a few inches at a time. You might start to sweat a little. I kind of wonder how many people were just watching this process unfold. Actually, I don't want to know. Whatever, the piece of wood made it on the darn dolly. Is that even what they're called?
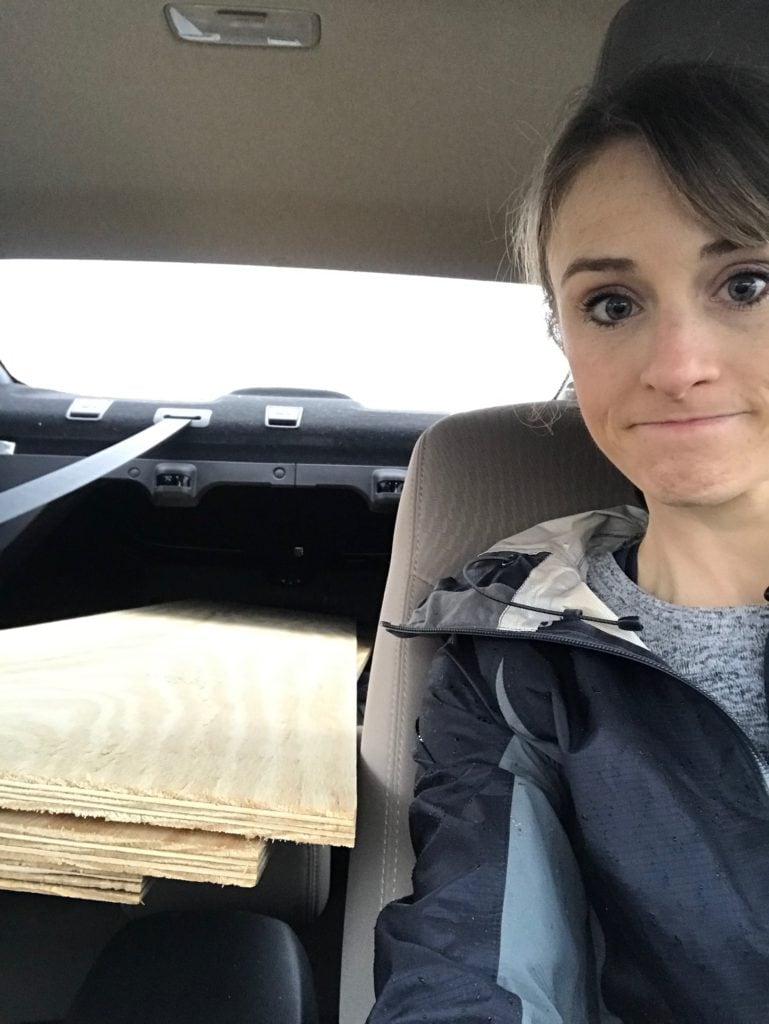
Another thing to consider is the vehicle that you bring with you to Lowes. I discovered that 7 feet is exactly the limit of what I can fit into my small sedan. Good to know.
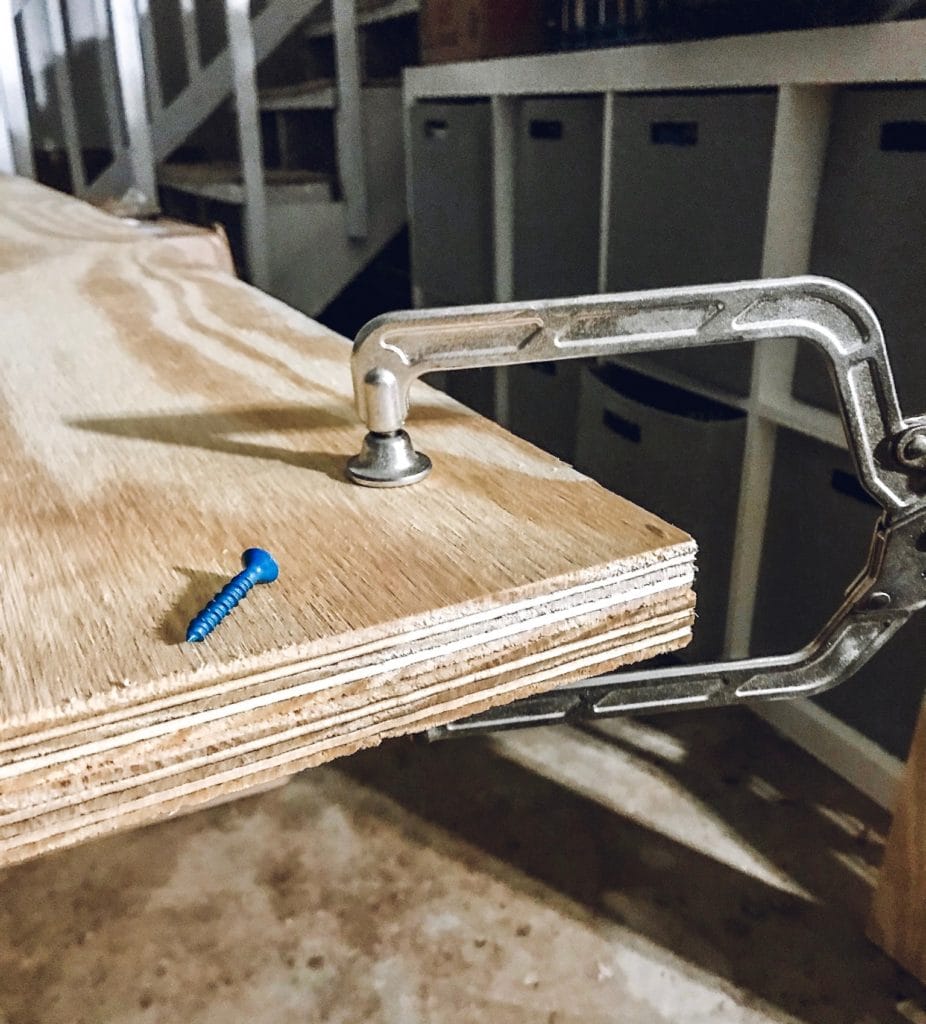
Once home (and feeling fairly accomplished), I screwed the two pieces together to create a thicker top. I'm pretty sure the screw pictured is for concrete or something like that. It was all I could find in our garage, and I wasn't about to go back to Lowes so that's what I used in all four corners and midway along the length of the table (for a total of six screws). If you're planning ahead, I recommend getting screws that are a little smaller than the width of the two pieces of plywood so that it keeps the boards together but doesn't start to poke through the top of the table. I was cutting it close.
Next came my favorite part: sanding. I adore my little sander that I got from Amazon. This is the one I have and for only $24 it works like a champ. At this point, just go to town sanding. I recommend starting with coarse sand paper and gradually working to the finer paper. I really focused on the edges with the coarse paper to help soften the edges and to make the two pieces look more cohesive.
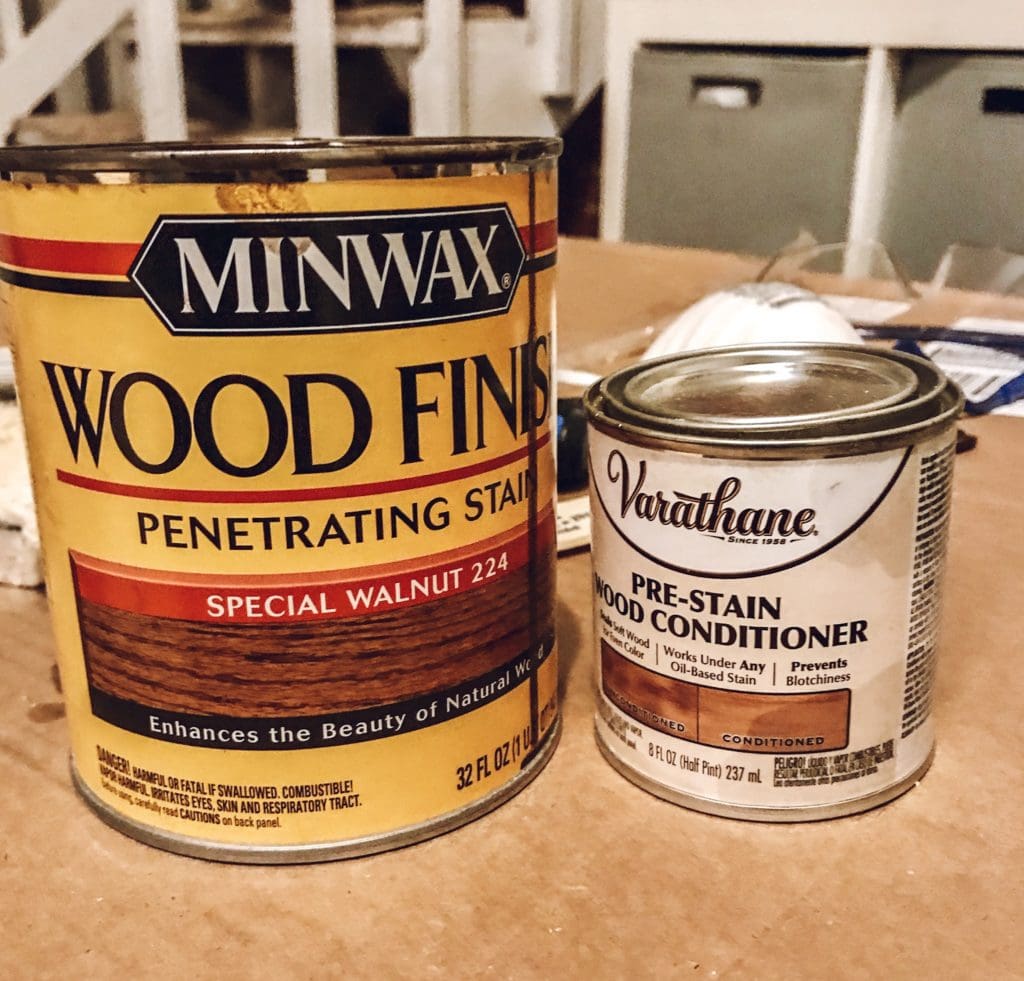
Once the table top was all sanded, I wiped it with a damp cloth to clean the surface and started the staining process. I already had leftover conditioner and stain from creating the desk in my office, so I used that. First I prepped it with Varathane Pre-Stain Wood Conditioner and let it dry. It says to let it dry for 30 minutes before applying the stain, but my garage was freezing and I needed to make dinner so I left it at that and resumed before work the next day.
Once the wood has been sanded and conditioned, it's time for the most satisfying part: staining! It's amazing how some mediocre pine plywood can suddenly be transformed with a simple stain. I used the Wood Finish Penetrating Stain in "Special Walnut 224". I let that soak in for at least 15 minutes and then wiped off any excess with a clean rag.
A couple days before, I purchased hairpin legs on Amazon. I purchased these ones for about $50 because they were the height I was looking for. Once the table top was dry, I moved it upstairs into our bonus room (depending on your staircase and the length of the table it will probably be easier to put the legs on once it is in its designated room). I simply followed the instructions for screwing the hairpin legs on to the table and voila! A SUPER simple table in just the dimensions I needed.
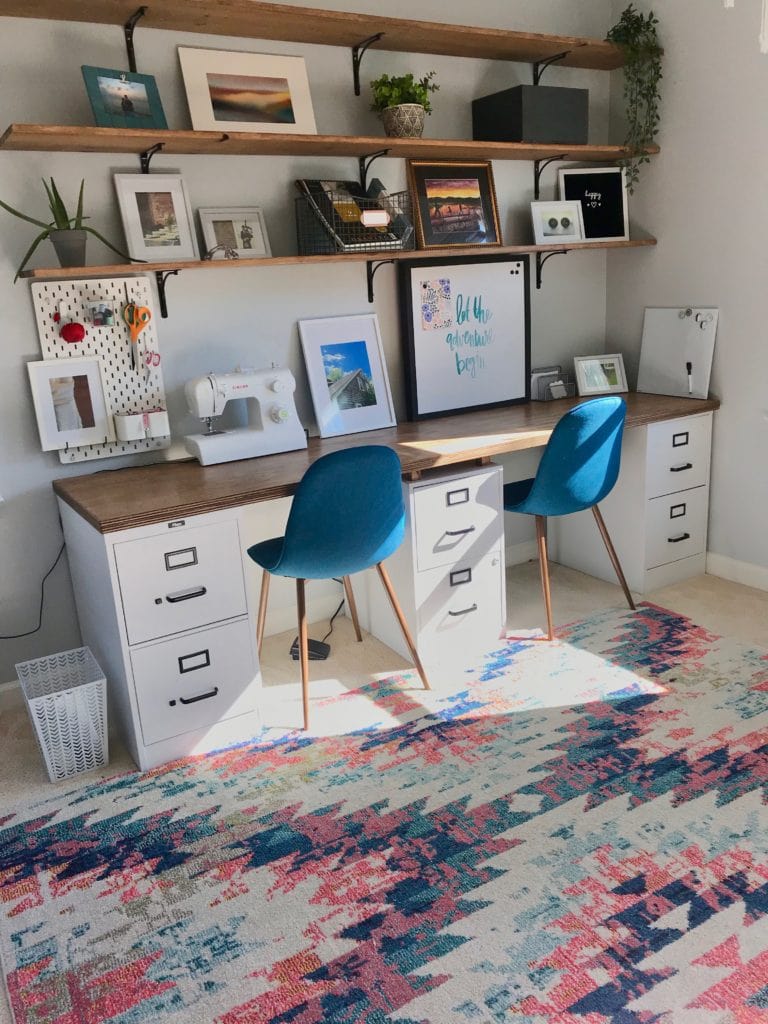
This project would work great for an easy side table, coffee table (you can find shorter hairpin legs), or even as a desk. As I mentioned, I used the same table top technique to make my desk but used thrifted filing cabinets that I spray painted as the base to make it more sturdy (and for storage). This is where I got my inspiration.
I like the flexibility of having a fairly light table that we can easily move to another wall during parties. This provides extra space that isn’t Jameson height, so he’s not tempted by the aroma of food (not that he would ever dream of sampling).
Here's a summary of items and tools needed for this project:
- Plywood cut into 2 equal sized pieces in the desired table dimension
- 4 hairpin legs
- 6 screws (make sure they are shorter than the thickness of your table)
- Wood conditioner (I used Varathane Pre-Stain Wood Conditioner)
- Wood Stain (I used this Varathane Pre-Stain Wood Conditioner)
- Sander
- Coarse, medium, and fine sand paper
- Drill
- Wood clamp (this is helpful but not necessary)
- A friend or husband if you don't want to look like a fool at Lowes
This post contains some affiliate links which means if you click on it and make a purchase I might eventually make a dollar from this post if people start to read it. It's something new I'm trying, and if you don't love that idea simply don't make a purchase directly from the link. I will only ever link to products that I use and love. <3
2 comments
Leave a comment